Add SparkLayer to your website
For you or your developer
These are a few small code changes to your website's theme. On Shopify, most of it is done for you: see Theme setup. Our team can also install SparkLayer for you, free.
The SparkLayer Frontend is what your B2B customers see on your website: their prices, the cart, quick order and their account. Adding it takes a few small code changes to your theme. Once they're in place, B2B customers can log in and start placing orders.
It takes three steps:
Add the Core Script
One script in your theme that loads SparkLayer on every page.
Add the product page widgets
They show each customer their own prices on product pages, and let them add products to an order.
Match your design
CSS variables set the colours, typefaces and spacing, so SparkLayer looks like the rest of your site.
After that, you can tailor the B2B experience further: Storefront has the settings, and Integrations has advice for each platform.
Personalised instructions
In the SparkLayer Dashboard, Storefront,Widgets (opens in your SparkLayer Dashboard in a new tab) gives you personalised instructions for adding the code snippets to your website.
The SparkLayer Core Script
The Core Script is a JavaScript snippet in your website's theme. It loads the frontend interfaces your B2B customers use to place orders, manage their account and more.
Installing the script
On Shopify, the SparkLayer app embed loads the Core Script for you, so there's no need to edit theme.liquid or other theme files.
To enable it:
- Go to the Theme setup (opens in a new tab) page in the SparkLayer Shopify app
- Select your theme from the Theme dropdown
- Click Enable app embed - this opens your Shopify theme editor in a new tab
- In the theme editor, click Save in the top right to activate the app embed
The Core Script now loads on your storefront. You can verify it's working by checking the App Blocks table on the same page, where the App Embed row should show as Enabled.

If you'd prefer not to install SparkLayer yourself, our team can do this for you free of charge. On the Theme setup page, click Install SparkLayer for me to request a free install.
Add the SparkLayer Core Script to the <head>...</head> of your website's theme so it loads on every page. On BigCommerce, this is typically in /templates/layout/base.html.
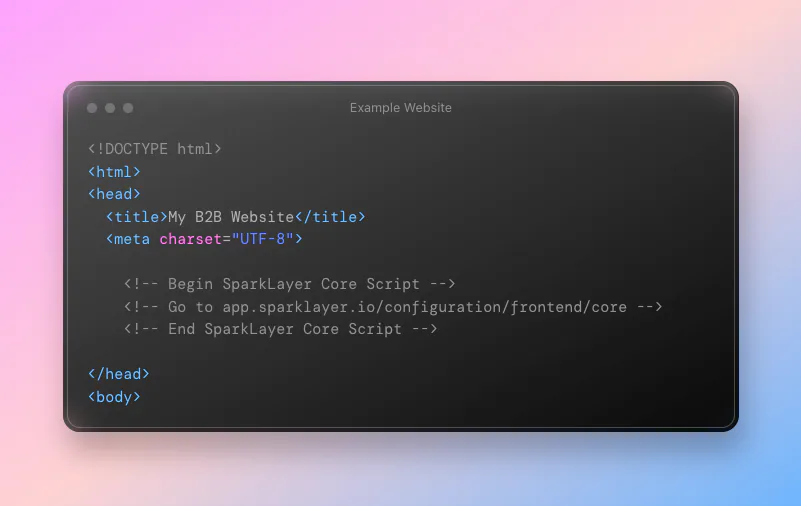
Your customised Core Script is in the SparkLayer Dashboard at Storefront,Widgets (opens in your SparkLayer Dashboard in a new tab).
<script async src="https://sparkcdn.io/sparkjs/yourstorehere/live"></script>A new installation uses the latest version of the Core Script. You can change the version later (see Upgrading to the latest version), and What's new lists the changes in each release.
Technical details
The Core Script gives SparkLayer the information that controls how it works on your website.
<!-- Copy your own from the SparkLayer Dashboard: Storefront > Widgets -->

<script>
  window.sparkOptions = {
    siteId: "examplestore", // your unique site id
    platform: "shopify", // your platform
    rootUrl: {{ routes.root_url | json }},
    language: {{ request.locale.iso_code | json }},
    accountRedirect: {
      urlRegex: /\/account/g,
      goTo: "/index", // page to redirect logged in users to
    },
    display: {
      stock: {
        show: false, // set to true to show stock level display
        max: 50, // highest stock level to show
        last: 5, // last remaining stock threshold
        low: 15, // low stock threshold
      },
    },
    auth: {
      user: {{ customer.email | json }},
      token: {{ customer.metafields.sparklayer.authentication | json }},
    },
  };
</script>
<script async src="https://sparkcdn.io/sparkjs/yourstorehere/live"></script>
This information includes:
| Item | Details |
|---|---|
siteId | The website's unique identifier (see your account and team) |
platform | The eCommerce platform of the website |
language | The language to be used |
accountRedirect | Where to send logged-in customers who visit a matching URL (urlRegex), and the page to send them to (goTo) |
display | Which display configurations to enable (see Storefront). Since Core Script 2.0, stock display is set per customer group in the Dashboard instead (see stock display) |
auth | The authentication details of the logged in customer |
Modifying the core script
The Core Script's options turn specific features on or off and customise how they work.
On Shopify, the app embed loads the Core Script for you. To add customisations or configurations, add a small <script> block to your theme that defines them.
Add the following to your theme's theme.liquid file, just before the closing </head> tag:
<script>
  window.sparkOptions = {
    ...window.sparkOptions,
    // Add your customisations here
  };
</script>
The ...window.sparkOptions line keeps any options your theme or another snippet has already set; without it, the new object replaces them.
For example, to set the language and send logged-in customers who visit an account page to your collections page:
<script>
  window.sparkOptions = {
    ...window.sparkOptions,
    language: 'en',
    accountRedirect: {
      urlRegex: /\/account/g,
      goTo: '/collections/all',
    },
  };
</script>
The window.sparkOptions block must come before the SparkLayer app embed loads, so place it in the <head> of your theme, not the <body> or footer.
On other platforms, window.sparkOptions is part of the Core Script you added to your theme's <head>. Change the options in that block: see Technical details for an example and what each option does, and the Core Script options for every option.
For every option, see the Core Script options. For the settings merchants manage in the Dashboard, see Storefront.
Upgrading to the latest version
To upgrade to the latest version of the Core Script, go to Storefront,Widgets (opens in your SparkLayer Dashboard in a new tab) in the SparkLayer Dashboard.
In the Upgrade Core Script section, select the latest numeric version, then click Save.
Update your website so it loads the matching Core Script. If you're not already on version 2, your Core Script looks something like this:
<script async src="https://cdn.sparklayer.io/spark.1.36.x.js"></script>Replace it with the version 2 format:
<script async src="https://sparkcdn.io/sparkjs/<site-id>/<env>"></script>| Item | Details |
|---|---|
<site-id> | Your unique Site ID, shown in the SparkLayer Dashboard at Account (opens in your SparkLayer Dashboard in a new tab) |
<env> | The SparkLayer environment: live, or test if you're using test mode |
For example, for a store with Site ID b2bstore on the live environment:
<script async src="https://sparkcdn.io/sparkjs/b2bstore/live"></script>Product page widgets
The product page widgets are the parts of SparkLayer B2B customers see on your product and collection pages when they log in. There are three:
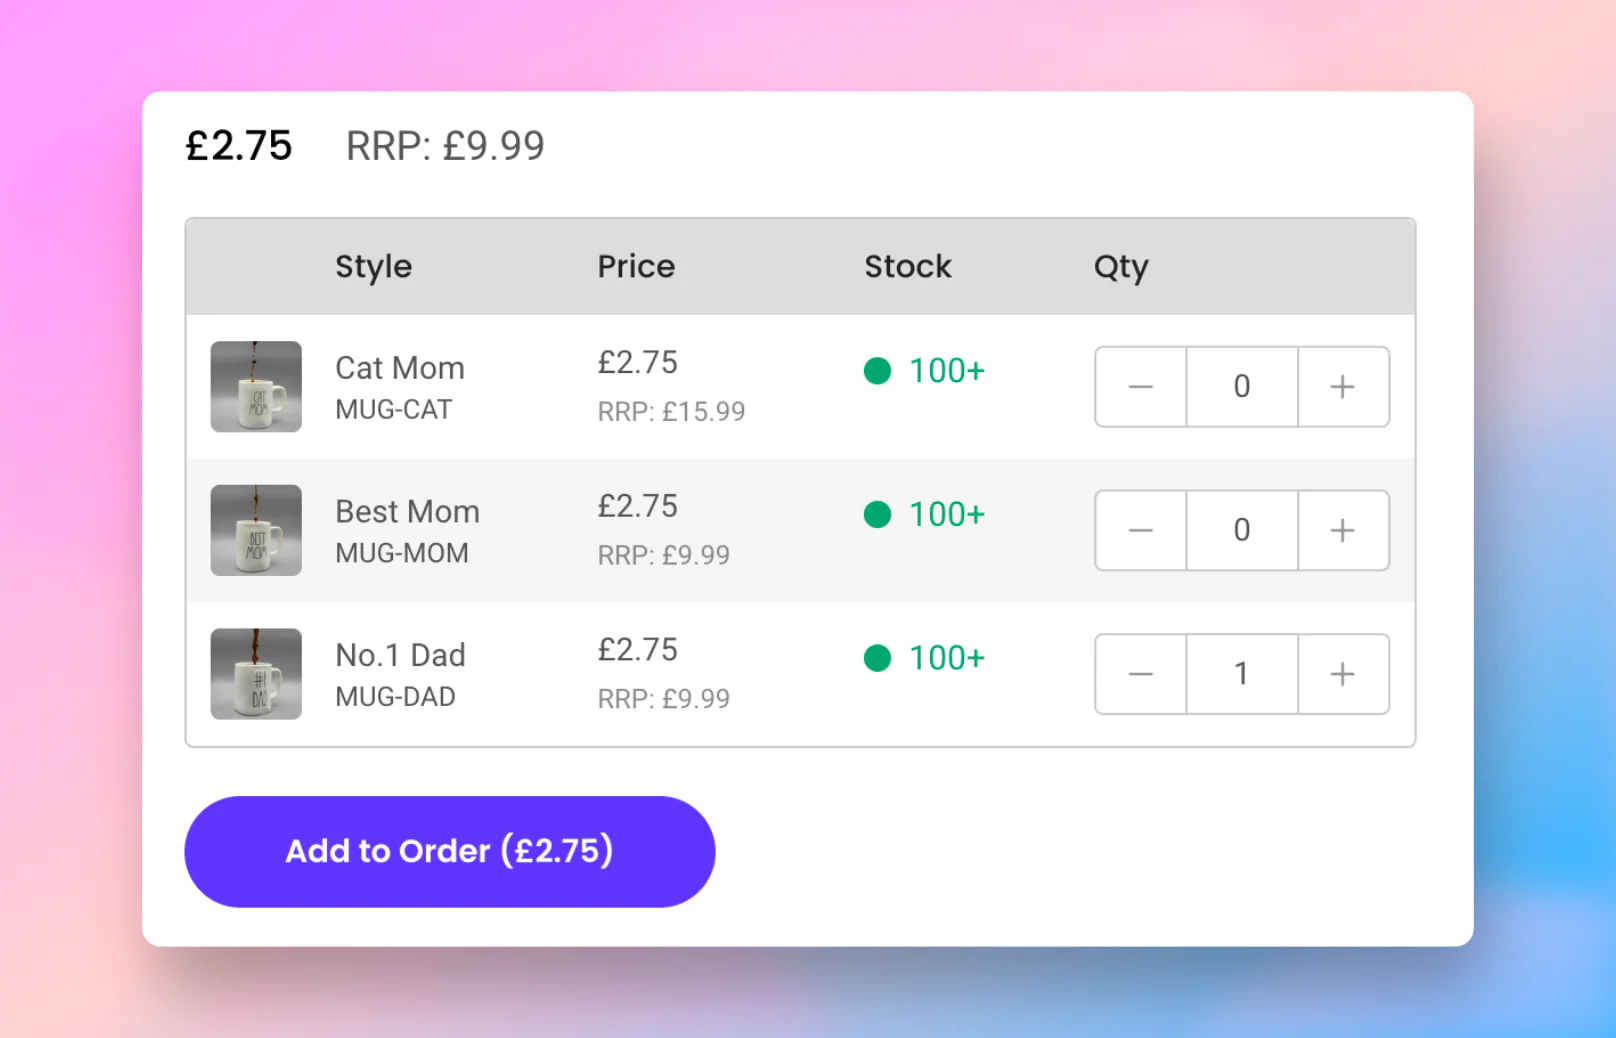
Shown on your product detail pages, it lets customers quickly add products to an order in a table view.
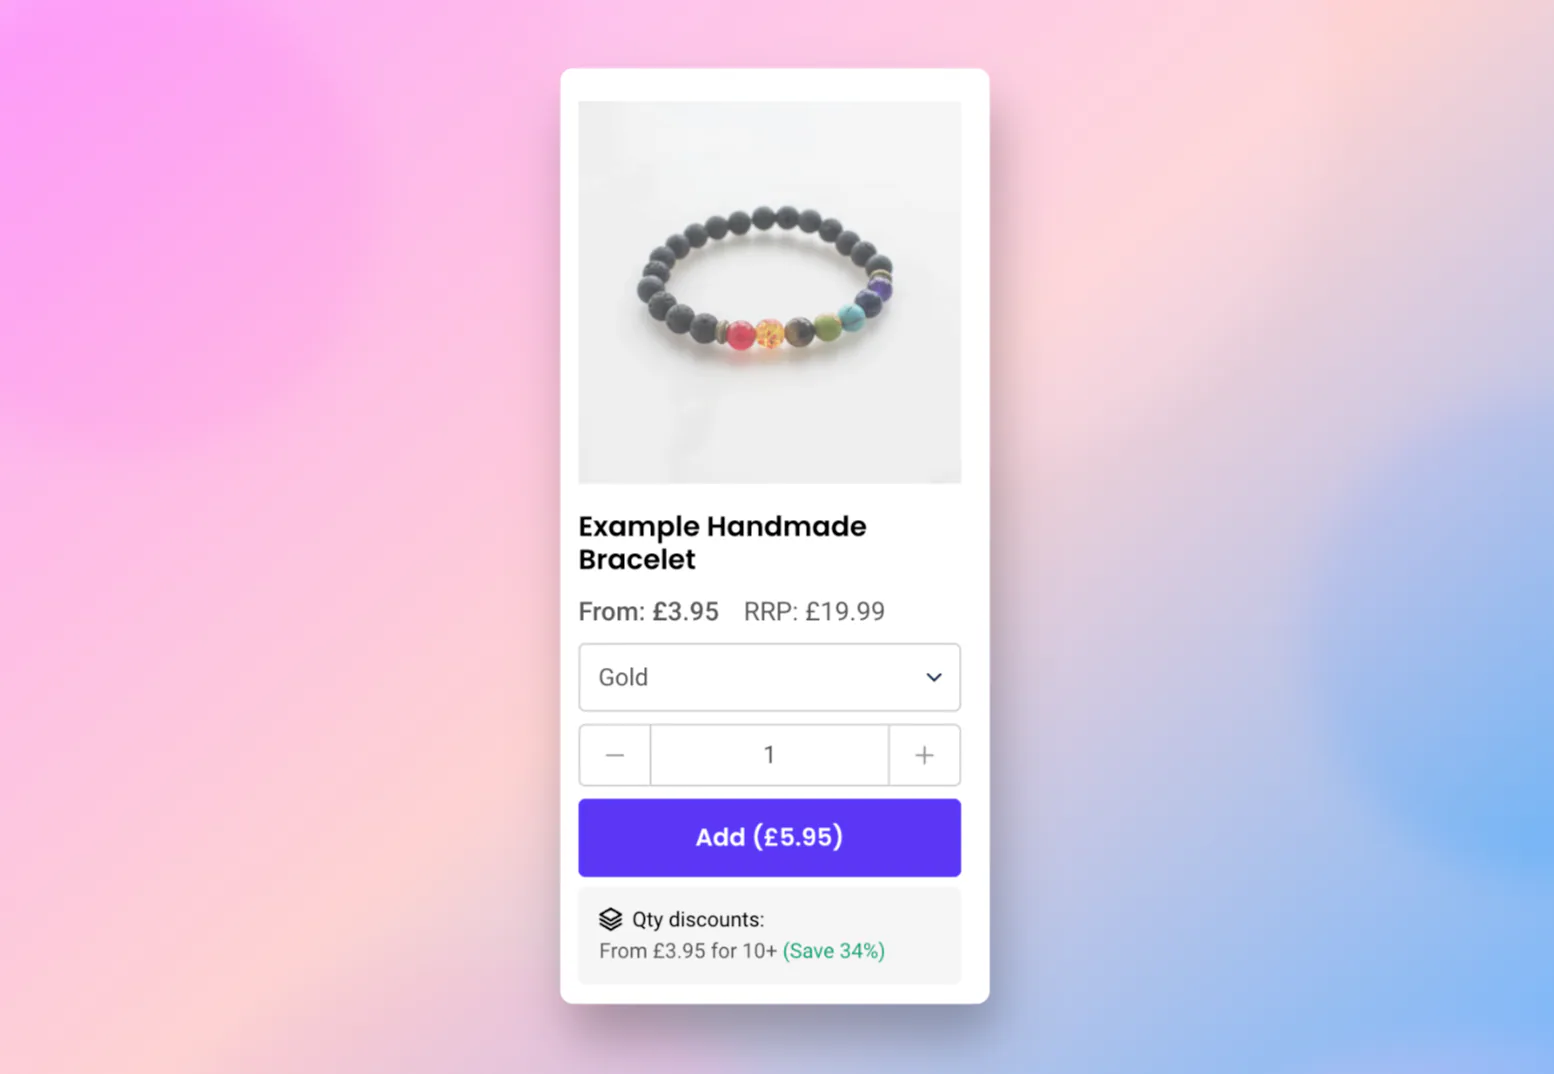
Shown wherever a product card appears, such as a collection page or a product upsell area.
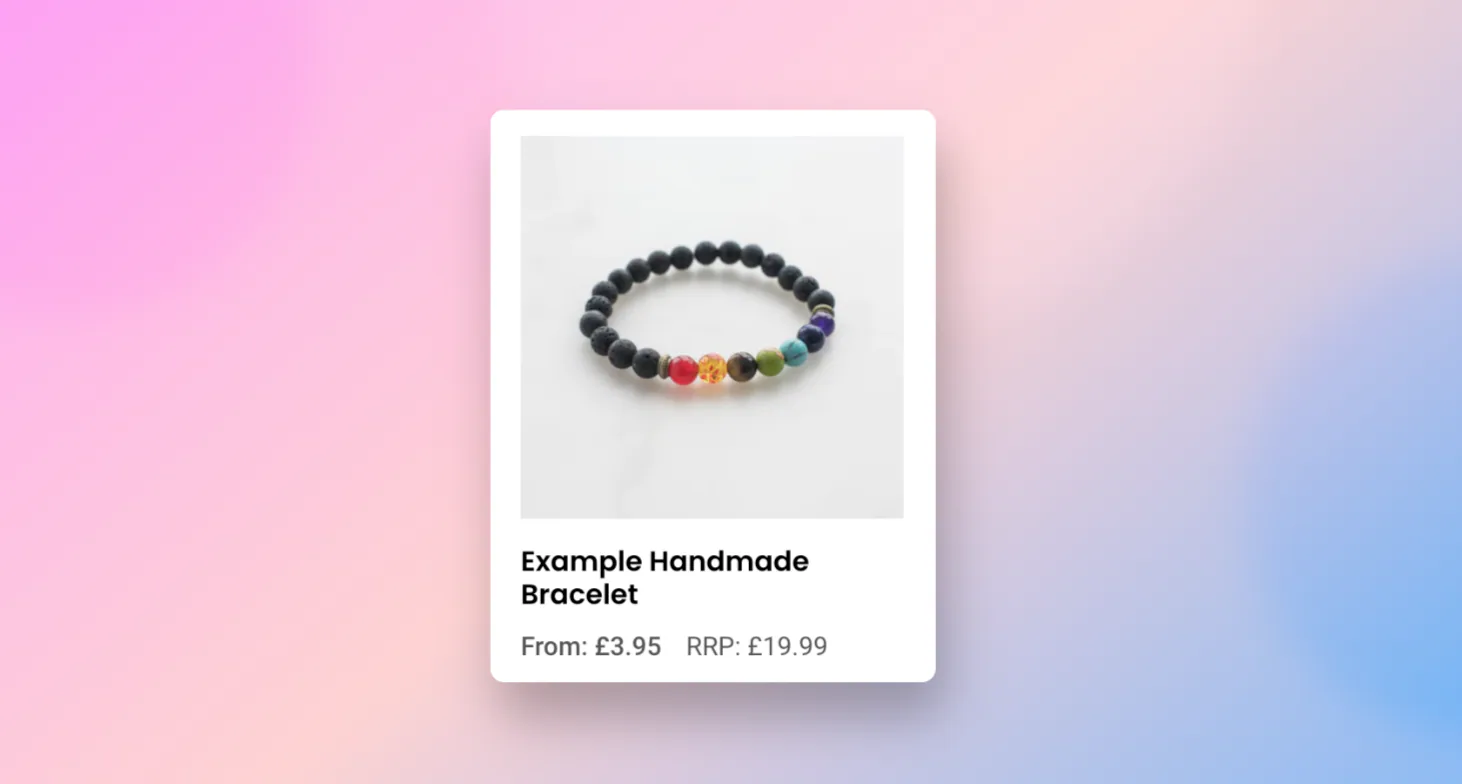
Shows a product's B2B price anywhere on your website, such as a product detail page or collection page.
Adding them takes two steps:
Hide the retail elements
If you're installing SparkLayer on your existing retail website, hide the elements B2B customers shouldn't see, such as your retail pricing, add to cart button, variant options and quantity selector. SparkLayer has an attribute you can add to any HTML element to do this (see Hiding elements).
Add the widgets
Add the SparkLayer code snippets to your product pages, such as the product detail page and collection page. When a B2B customer logs in, the interfaces show automatically, so they can see prices, add items to an order, view their account and check out. See Storefront widgets for each interface and how to customise it.
Hiding elements
SparkLayer can hide any element on your website from B2B customers with a data-spark attribute.
Elements you would typically hide include:
- Price information
- Product variant information
- Quantity selection
- Buy button
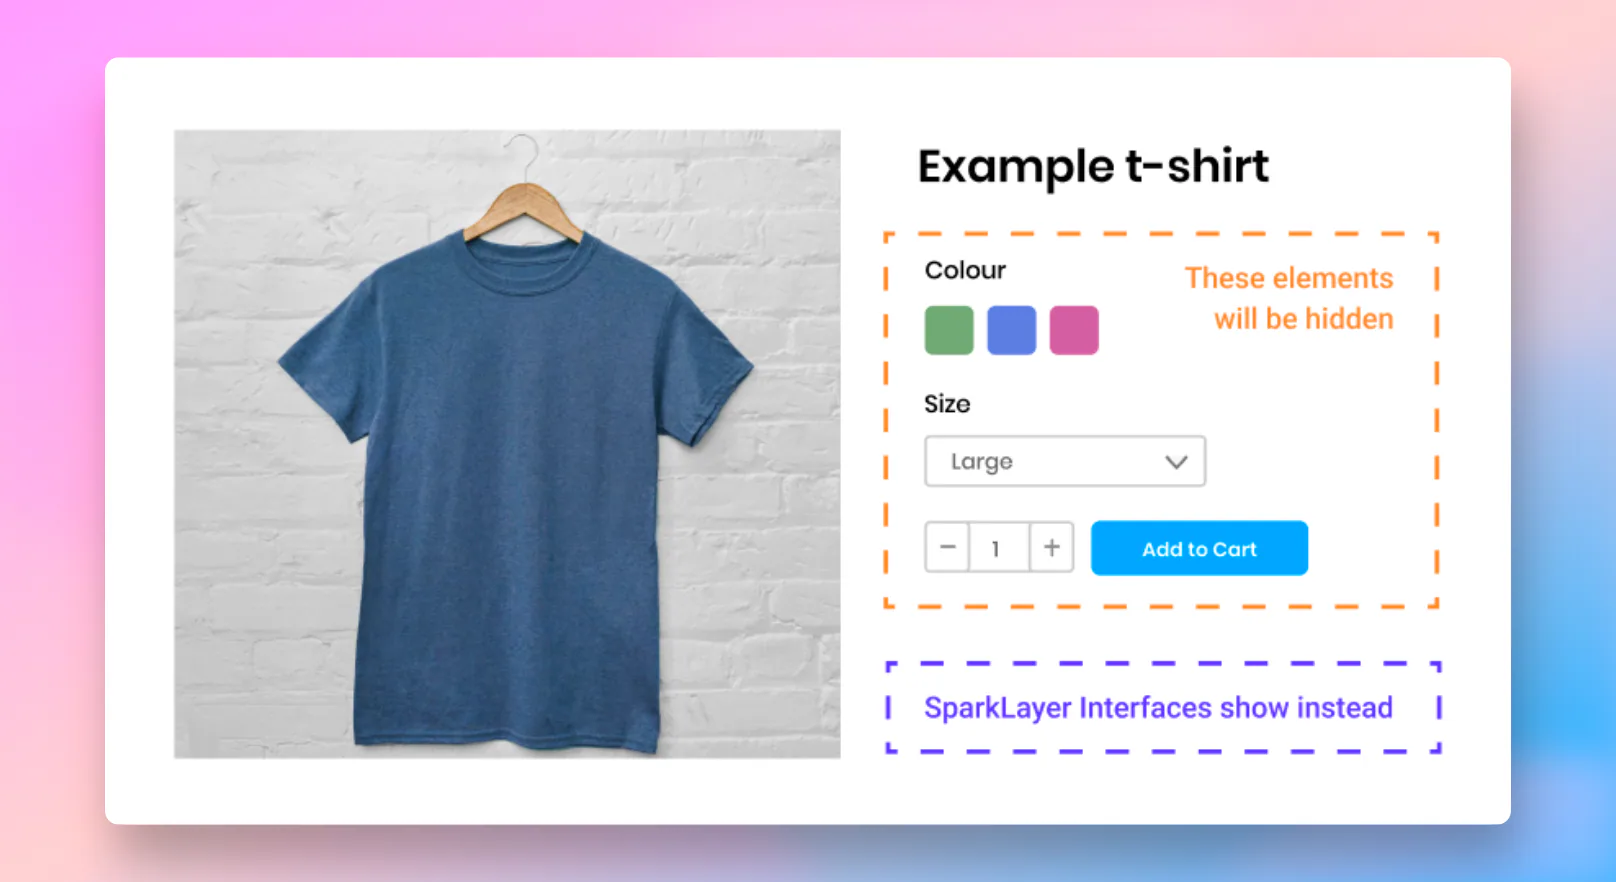
You need access to your website's source code to find the files that contain the elements you want to hide, such as:
- A product detail page
- A product collection page
- Specific "components" that are used in multiple locations on your website
In those files, add data-spark="b2c-only" to each element you want to hide. SparkLayer then applies display: none to the element when a logged-in B2B customer views the page.
This step changes your website's code, so you may want a developer to help. For platform-specific guidance, see Integrations.
<div data-spark="b2c-only">
  <!-- Anything inside here will be hidden for B2B customers -->
</div>

<p class="price" data-spark="b2c-only">
  <!-- In this example, the price would be hidden -->
  {{ product.price }}
</p>

<!-- Repeat this process for any HTML element you want hidden -->
Displaying the SparkLayer interfaces
Next, add the SparkLayer frontend interfaces to your pages. Each interface's page explains how to add its code snippet.
| Interface | Details |
|---|---|
| Product detail | Shown on your product detail pages; lets customers quickly add products to an order. |
| Product card | Shown wherever a product card appears, such as a collection page. |
| Product price | Shows a product's B2B price anywhere on your website, instead of or alongside the product card. |
Design customisations (CSS)
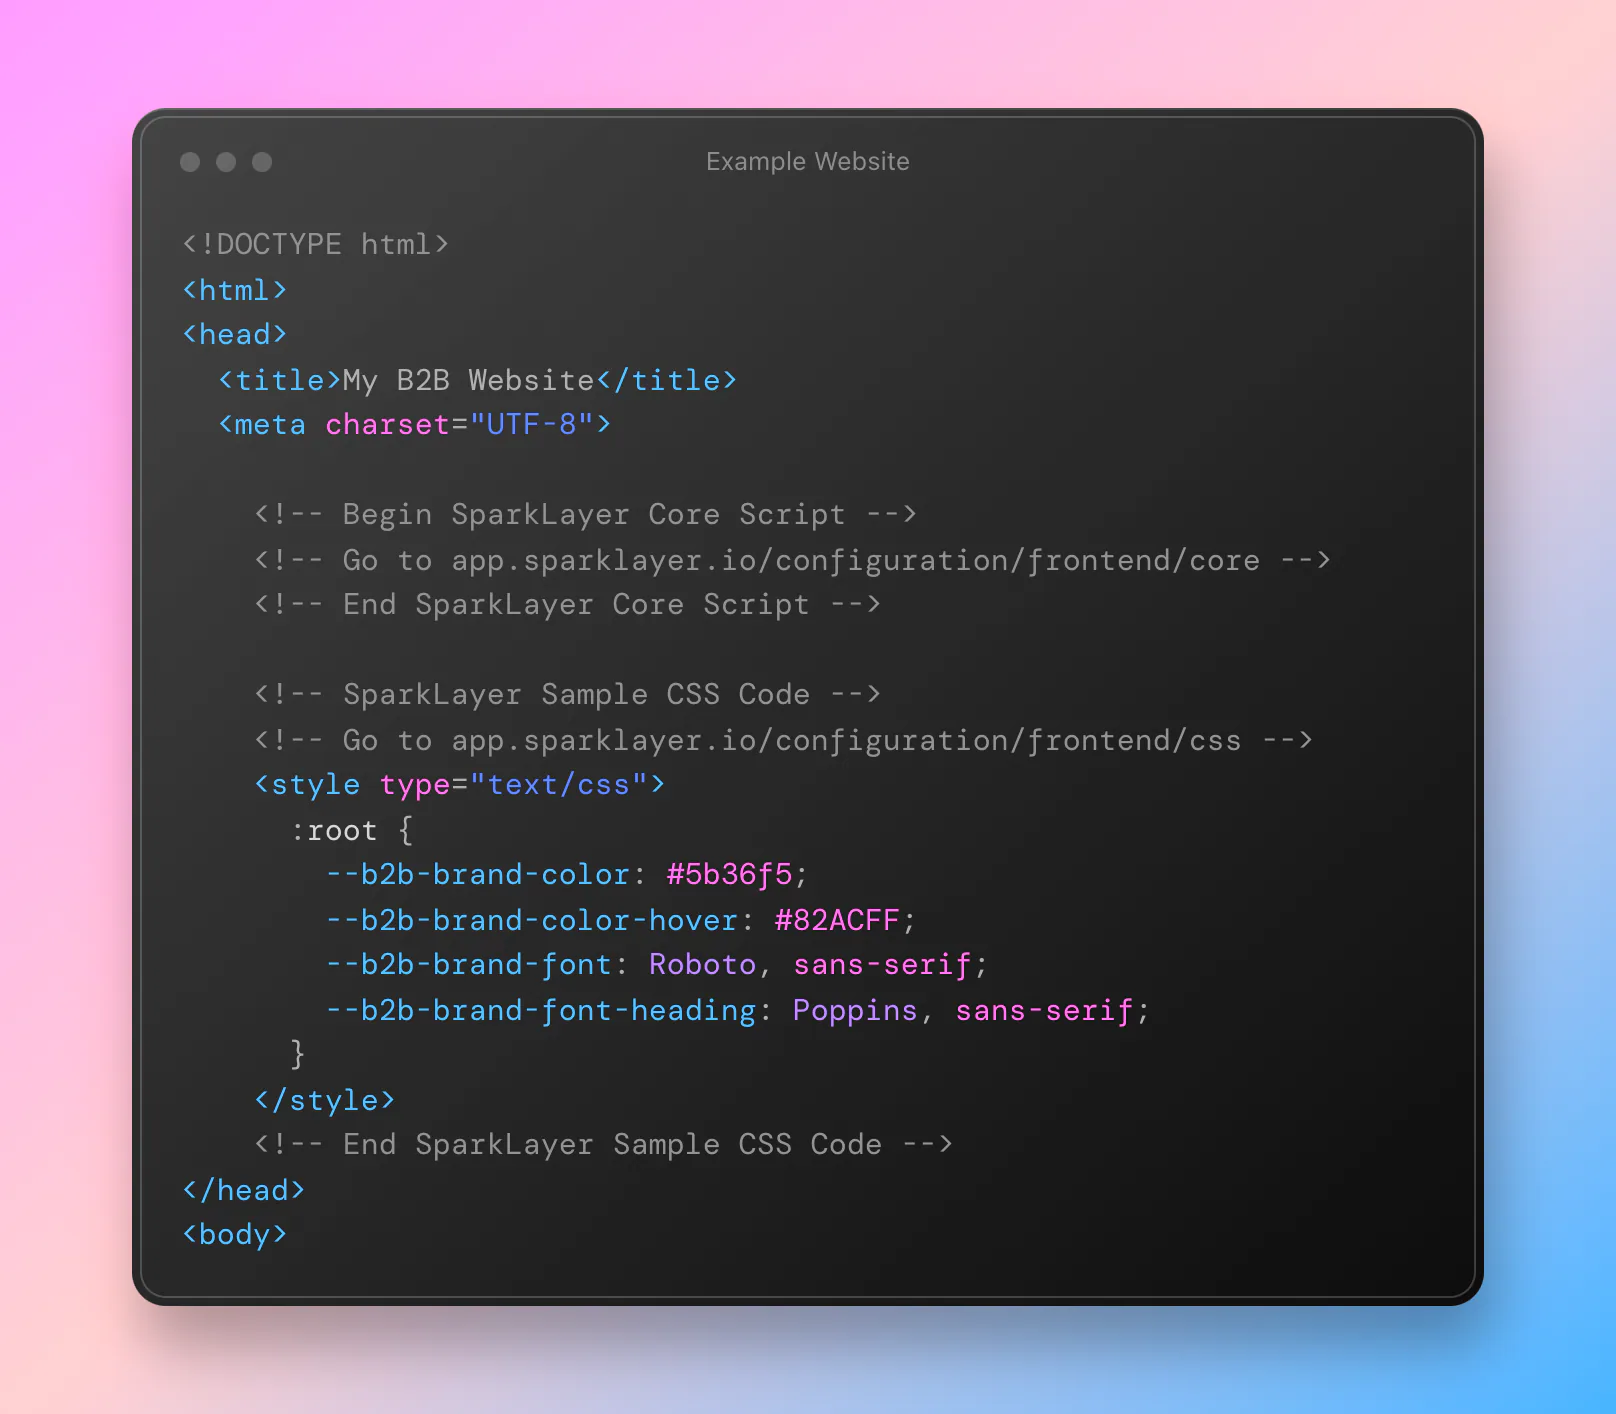
SparkLayer's interface is neutral by default, and you can change nearly every aspect of its look and feel with CSS variables, including:
- Colours
- Typography (e.g. typefaces and font sizing)
- Spacing (e.g. padding and margin)
- Button styling
- Form styling
Add the CSS to your existing stylesheets, or to your website's <head>...</head> as you did with the Core Script.
What can be styled
To find the styles you want to change, use your browser's Inspect element tool. SparkLayer's styles use CSS variables prefixed with --spark-, and you can override each one.
In the inspector, you'll see something like the example below. To change a style, such as a button colour, set the matching variable in your website's CSS. See Customising the design for details.
.btn, .btn-large, .btn-small {
    color: var(--spark-button-raised-color,var(--spark-lightest-color,#fff));
    background-color: var(--spark-button-raised-background,var(--spark-secondary-color,#125ef8));
    border: var(--spark-button-border,none);
    border-radius: var(--spark-button-radius,var(--spark-border-radius-button,4px));
    padding: var(--spark-button-padding,.875em 1.75em);
    text-transform: var(--spark-button-text-transform,none);
    letter-spacing: var(--spark-button-text-letter-spacing,0);
    font-weight: var(--spark-button-font-weight,400);
    font-family: var(--spark-button-font-family,Poppins,sans-serif);
}
Frontend integration checklist
Before you launch, check you've covered everything:
- Core Script added. You've added the SparkLayer Core Script to your website's
<head>. On Shopify, you've enabled the SparkLayer app embed. - Product detail widget added. You've added the SparkLayer product detail widget to your product detail pages, and hidden content B2B customers shouldn't see, such as your regular direct-to-consumer (DTC) pricing, add to cart buttons, "sticky" content that references pricing, and non-B2B content.
- Product card widget added. You've added the SparkLayer product card widget to your product cards (typically on collection and category pages), and hidden DTC pricing, add to cart buttons, "quick buy" buttons and non-B2B content.
- Every product card checked. You've checked all areas of your website that show product cards, such as the homepage and product recommendations.
- CSS and design. You've added the SparkLayer CSS to your website (in the header or a CSS file) and styled it to match your branding.
- Cart and cart drawer. Clicking the cart icon in your website header opens the My Cart interface. If it doesn't, make sure the cart link points to
/cartand doesn't trigger your theme's JavaScript for B2B customers. - General site audit. You've checked features such as site search and wish lists, so DTC prices are hidden (in CSS or in the code).
Next steps
- Storefront widgets: add and customise each interface.
- Core Script options: every
sparkOptionssetting. - Technical information: browser support and analytics event tracking.
- JavaScript SDK: build custom or headless interfaces.
Last updated