Cart & Checkout
Custom checkout fields
Custom checkout fields allow you to capture additional information from customers during the checkout process. It's a great way to allow customers to add data such as preferred shipping date, Purchase Order numbers, and more!

Once enabled, the custom checkout fields will display on the 'Shipping' step of the My Cart Interface before the customer selects their shipping address.
How custom checkout field data is stored
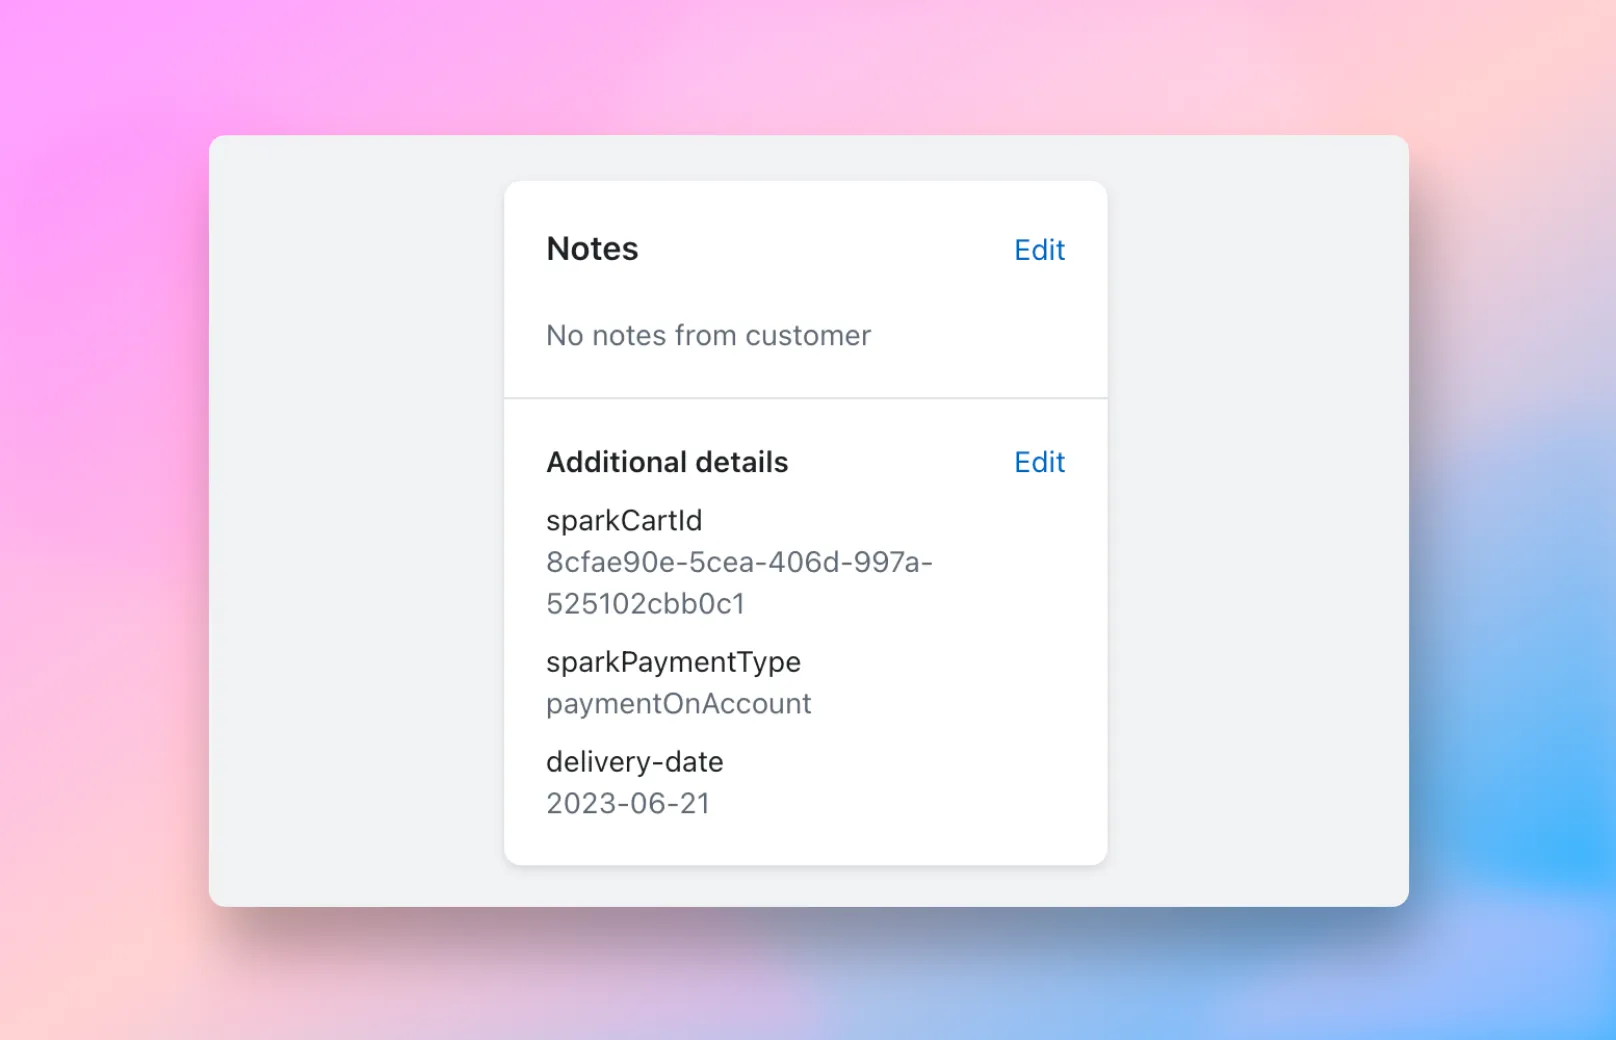
When a customer completes a custom checkout field, these will be attached to their order data as special 'Notes'.
In the context of Shopify, these will display as "Additional details" within "Order Notes". From a data perspective, these are referred to as "custom attributes" which can then be retrieved and used to display on packing slips, email notifications, and even sent through to a backend system (via the API) and more.
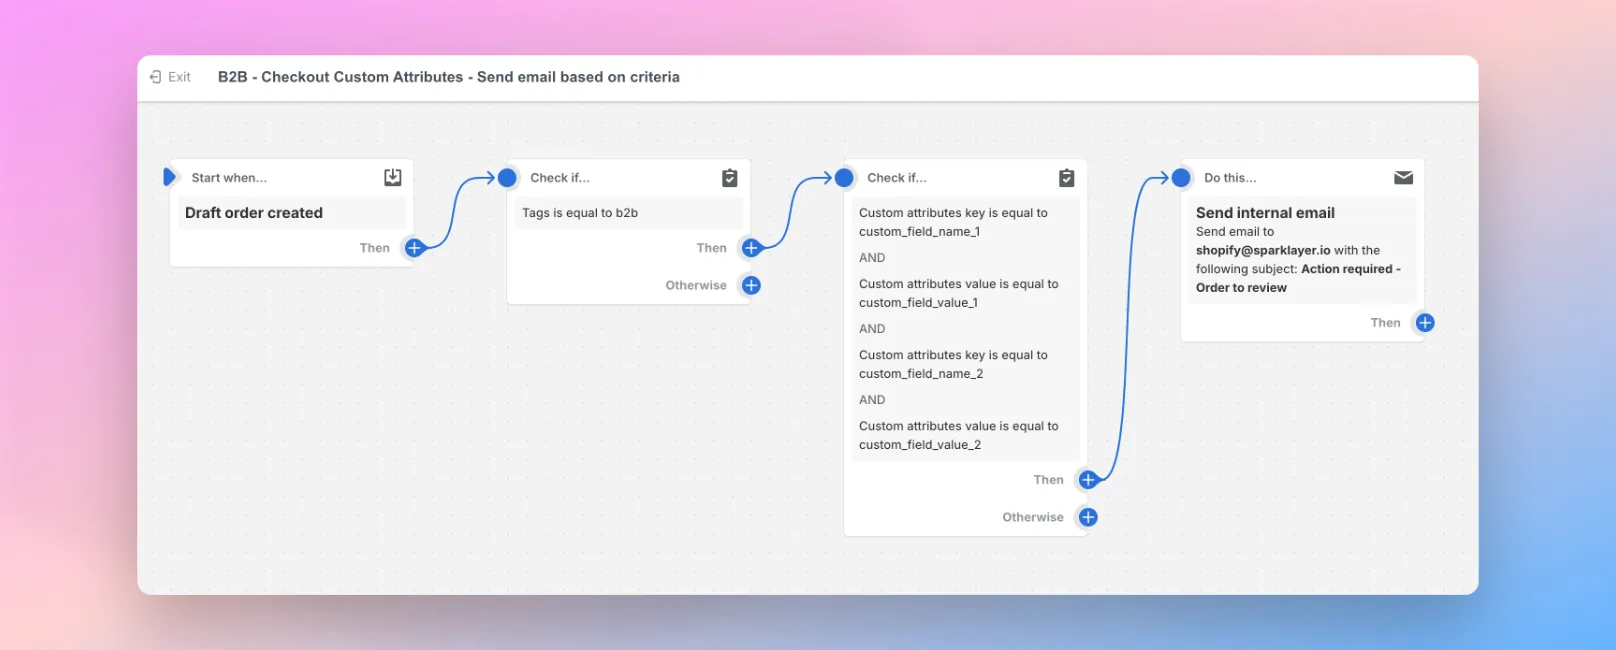
If you're using automation apps such as Shopify Flow, you can also set up triggers based on specific custom fields that the B2B customer has filled in. To see some examples, you can review our ready-made Shopify Flow templates.
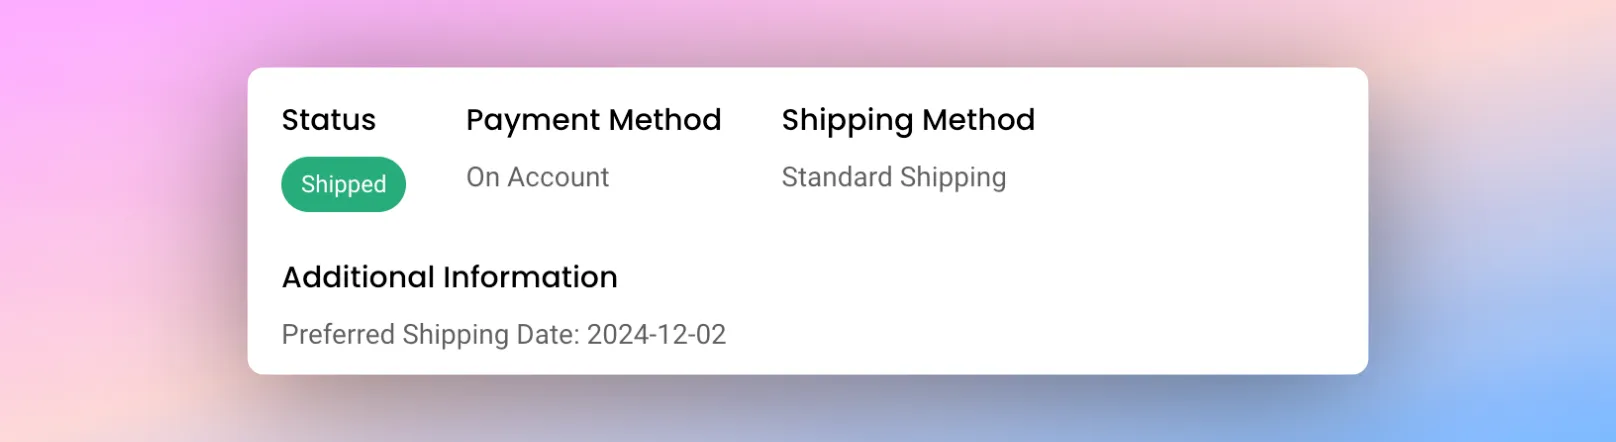
Some third-party Shopify apps may also support displaying "Additional details" on the invoices they generate and we recommend speaking directly with the specific app to learn more.
From a B2B customer's perspective, any checkout custom fields you set up will also show against their orders when viewing order history within My Account Interface
How to add custom checkout fields
Custom checkout fields work by adding special code to your website within the SparkLayer Core Script.
In our example, we've included how this would work with an example 'shipping date'. This can also be adapted with a wide range of other field types such as radios, date pickers, text fields (see below for the full list).
Updating the display You can update the default display by adding code to your Core Script. Learn more about how to update display settings on SparkLayer
/* Add the below code into the SparkLayer Core Script */
/* Please refer to our help guide on how to do this */

checkoutCustomElements: [
  {
    name: "delivery-date",
    translations: {
      en: {
        title: "Delivery Date",
        detail:  "Delivery unavailable on weekends."
      }
    },
    attributes: {
      required: true,
      type: "date"
    }
  },
],
/* End of code */Custom element configuration options
Key | Details |
|---|---|
name | The name of the custom field. This is shown in your eCommerce platform but is not visible to customers. (required) |
translations | An object containing customer-facing strings. Keys must be 2 letter language codes (ISO 639-1). (required) |
attributes | HTML attributes applied to the element. Use these to specify the type of input and validation rules. These include:
|
title | It's also possible to customise the text that is shown to the customer using translations. Text shown in bold above the input (required) |
detail | Small 'helper' text shown beneath the input. Useful for explaining what the field is for and acceptable values. |
Supported element attributes Some attributes only apply to certain input types and you can find more detailed documentation can be found here.
Example custom checkout fields
To get started, we've included some of our most popular customer checkout field types.
Updating the display You can update the default display by adding code to your Core Script. Learn more about how to update display settings on SparkLayer
Supported form field types
Custom checkout fields currently support the following field types:
Field Type | Notes |
|---|---|
text | Freeform text entry |
select | Drop down menu |
number | Number entry |
date | Date, DD/MM/YYYY |
time | Specific time, 00:00 |
week | Week (4) |
month | Month of year (12) |
datetime-local | DD/MM/YYY 00:00 |
checkbox | Allows multiple selections |
tel | Number entry for phone |
Email entry | |
url | Website URL entry |
file | File attachment |
Standard checkout fields
Alongside the freeform custom checkout fields above (which use a name), SparkLayer supports a set of standard checkout fields. These use a known id instead of a name, so SparkLayer recognises them and integrates them more deeply with your store.
Because they're recognised fields, each one is mapped to a structured location in your orders (rather than a generic order note), is available in your theme and template editor, and can be searched and filtered. This makes them a better choice than a freeform field when you're capturing a customer reference, purchase order number, or requested shipping date.
The following standard fields are available:
Field | Field ID |
|---|---|
Customer Reference | customer-reference |
PO Number | po-number |
Requested Shipping Date | shipping-requested-date |
Please note The id must match exactly for SparkLayer to recognise the field and apply the integration described below.
Adding standard checkout fields
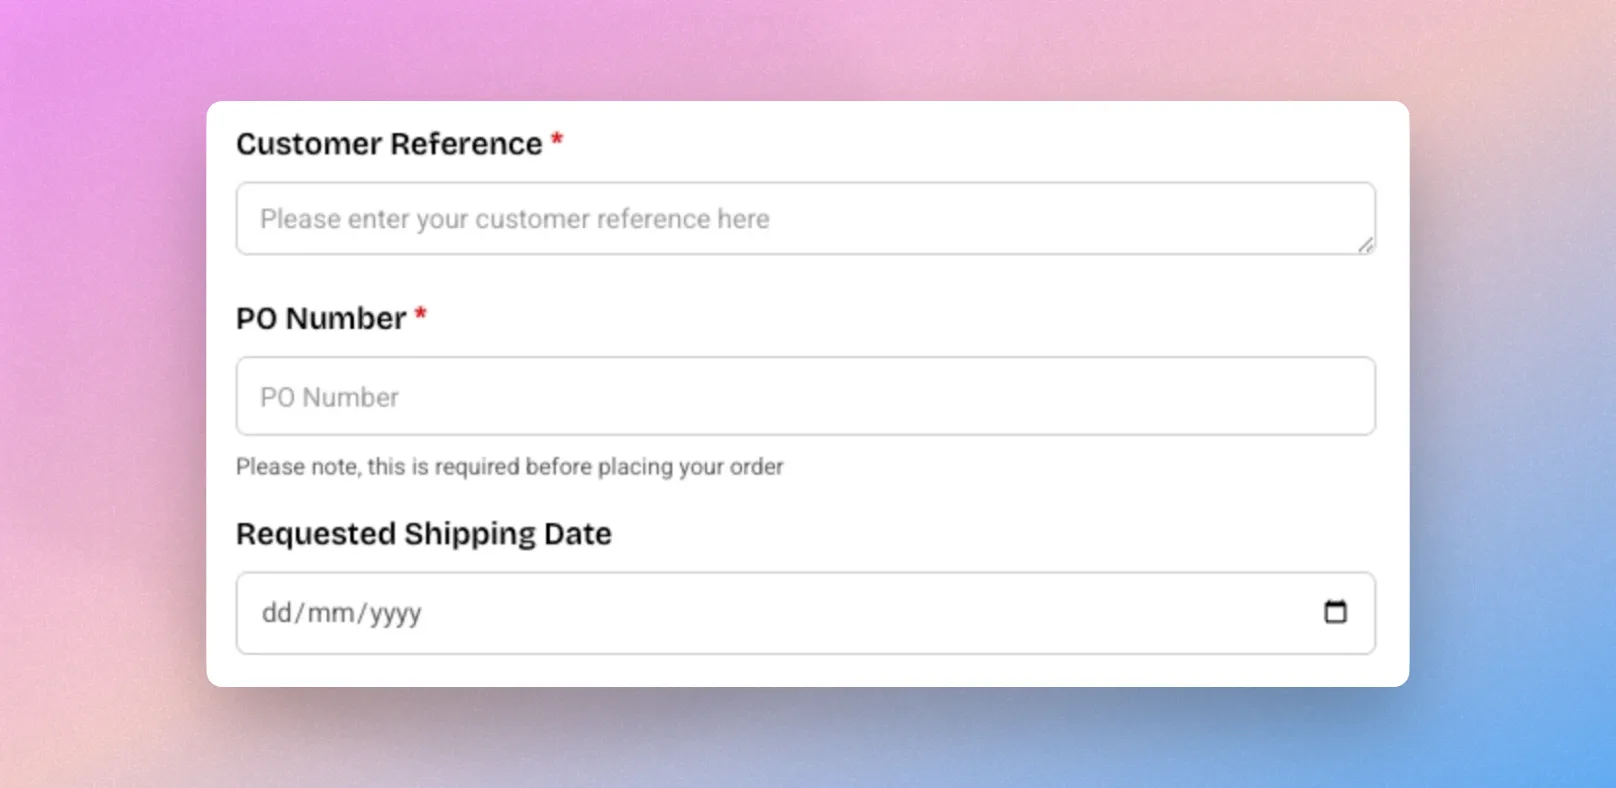
To get started, you can enable the standard checkout fields via Storefront Options within the SparkLayer Dashboard. For a more advanced setup, you can also add the standard fields to your core script using their id.
/* Add the below code into the SparkLayer Core Script */
/* Please refer to our help guide on how to do this */

checkoutCustomElements: [
  { id: "customer-reference" },
  { id: "shipping-requested-date" },
  { id: "po-number" },
],

/* End of code */
Standard fields support the same attributes and onChange keys as custom checkout fields, so you can apply validation such as required: true, along with more advanced configurations (see Customer checkout fields above for the full list of supported attributes).
/* Add the below code into the SparkLayer Core Script */
/* Please refer to our help guide on how to do this */

checkoutCustomElements: [
  {
    id: "customer-reference",
    attributes: {
      required: true,
    },
  },
],

/* End of code */
Where standard fields appear in your orders
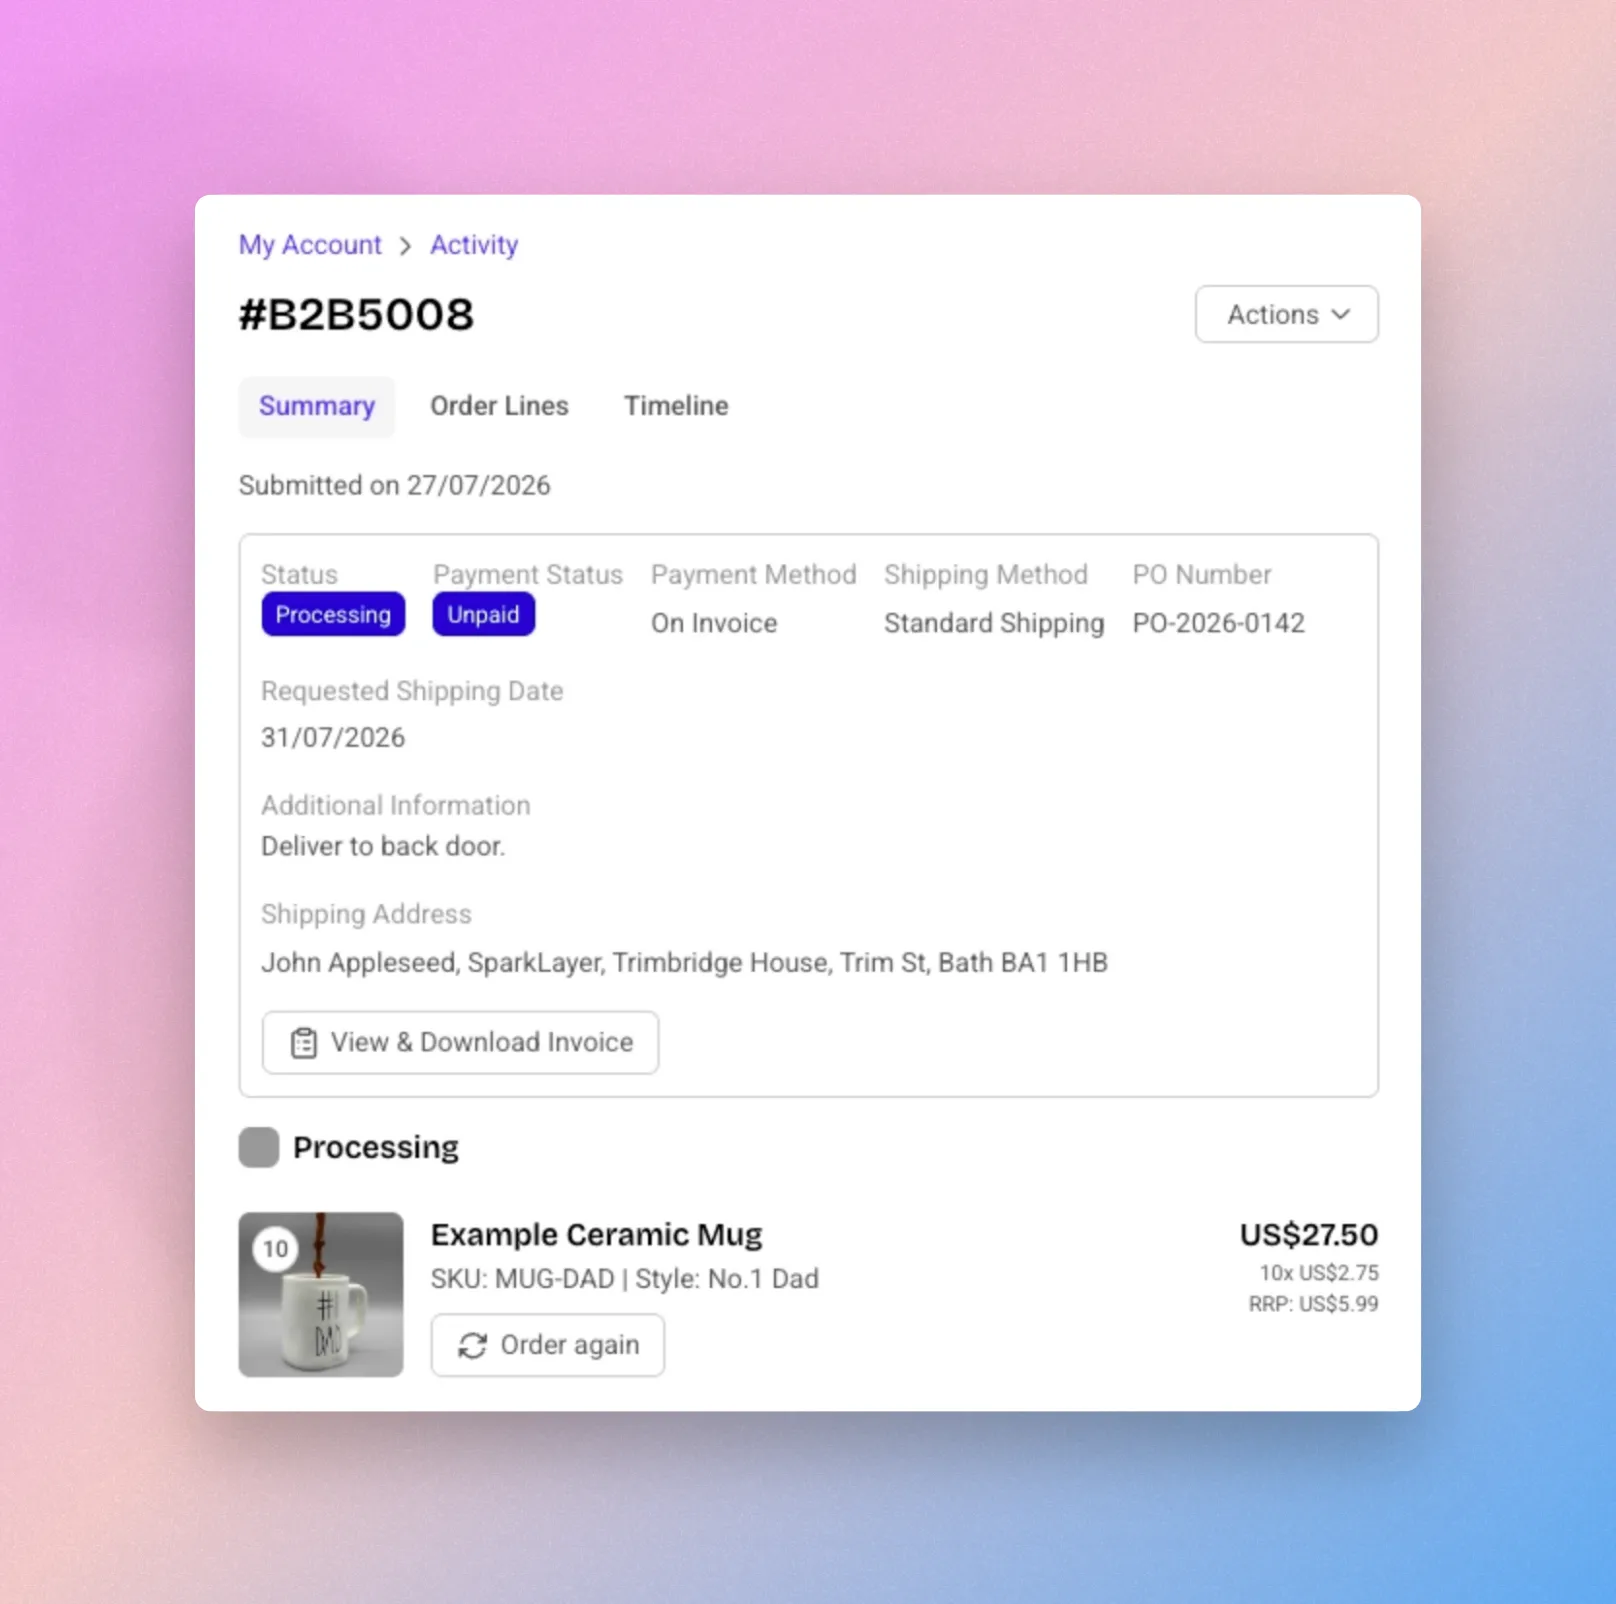
Unlike freeform custom fields, which are stored as generic order notes, each standard field is mapped to a structured location on the order:
Field | Where it appears |
|---|---|
PO Number | The native Shopify PO Number field on the order. |
Requested Shipping Date | A dedicated custom field on the order (shown as sparkShippingRequestedDate). |
Customer Reference | The Shopify order notes field. |
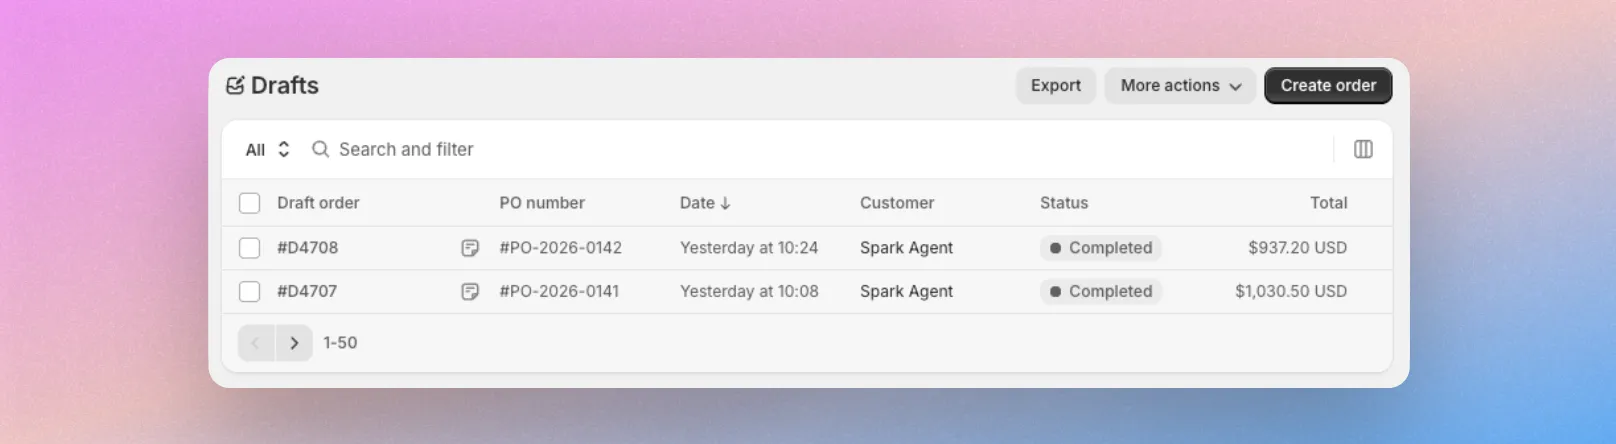
Because these fields map to structured data, they're also available in your theme and template editor, so you can display them on documents such as invoices.
Searching and filtering by standard fields
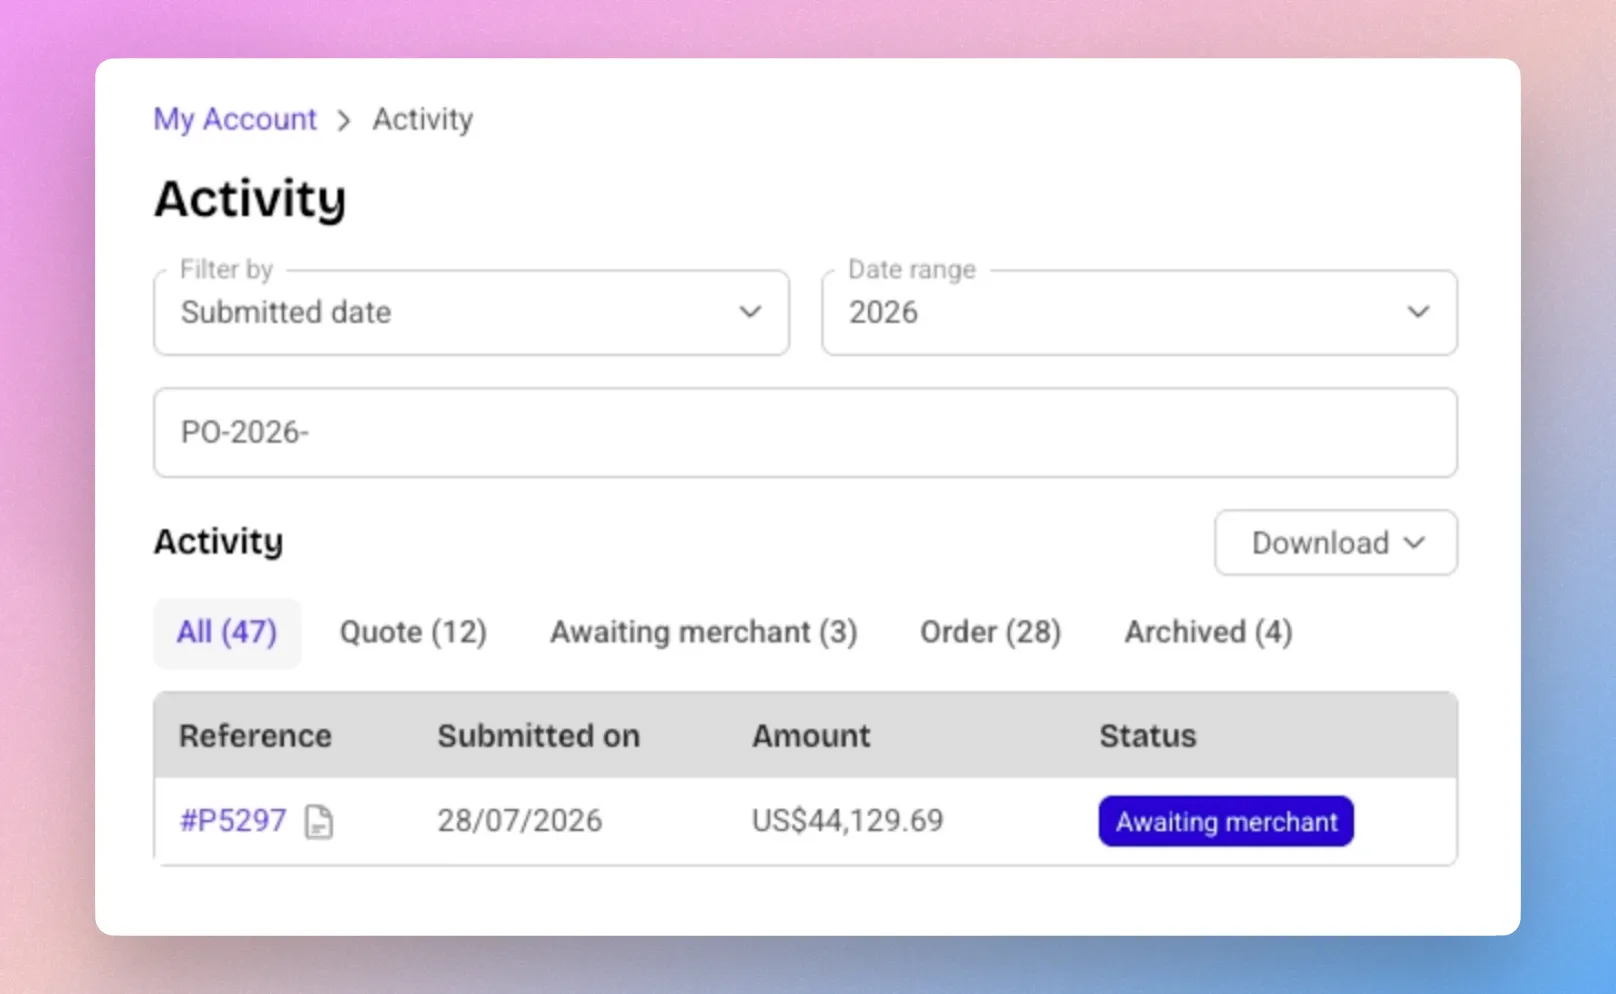
Mapping each field to structured data also means you can find orders by the information customers enter. From the order and activity views you can:
- Search by Customer Reference
- Search by PO Number
- Filter by Requested Shipping Date (using a date range)
Migrating to standard fields
If you're already capturing any of these fields using the older approach, you can move over to the standard fields to gain the deeper integration.
File Upload (file attachments)
Please note The file upload feature is only available on the SparkLayer Growth, Pro, and Enterprise plan. You can change your plan here or learn more about our how pricing works.
SparkLayer supports the ability for B2B customers to upload files during the checkout process. This is a great way to capture additional details from the customer such as a "Purchase Order", details specific to the order, or any other file that is relevant to their account.
SparkLayer also supports customers to upload details per line item (such as logos or name customisations) and you can learn more below.
File upload at checkout
The file upload at checkout flow works as follows:
The B2B customer will see a special field during the checkout process where they can upload relevant files.
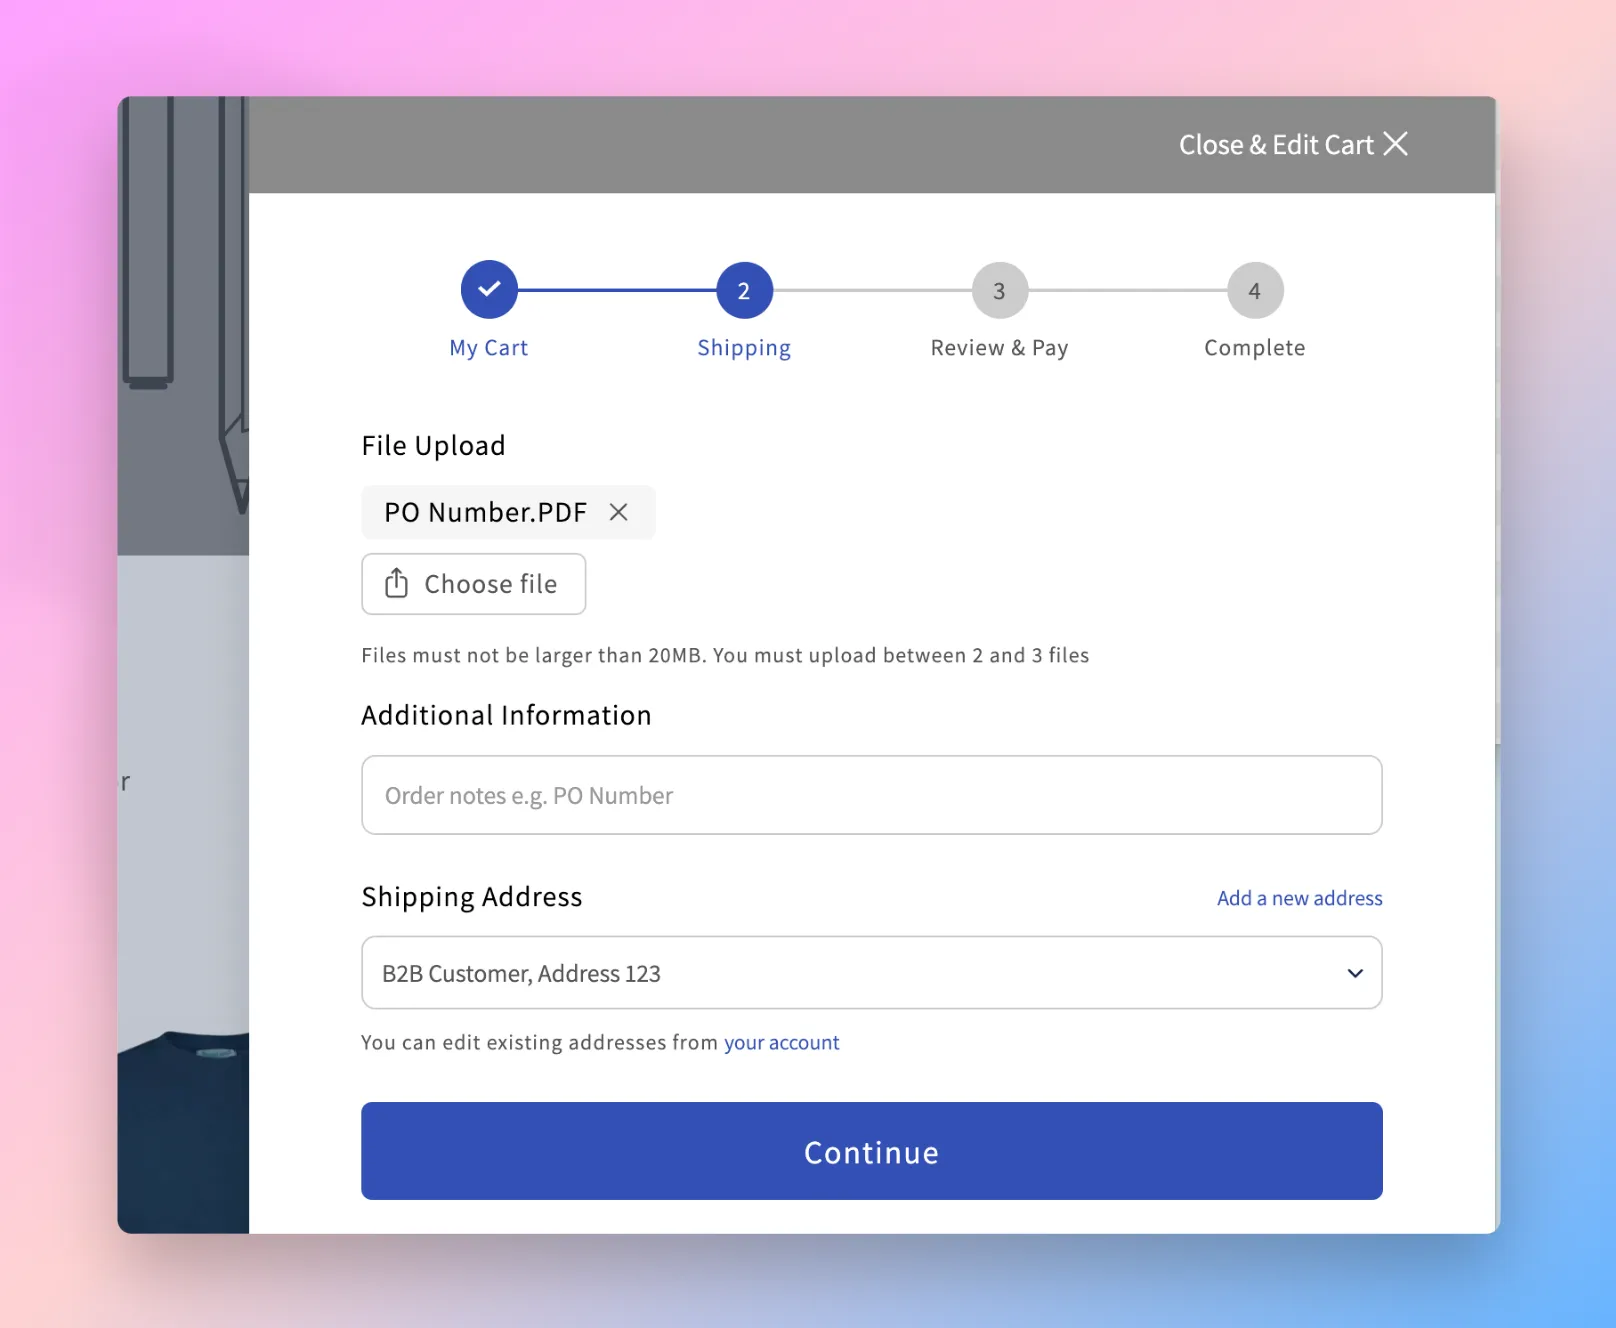
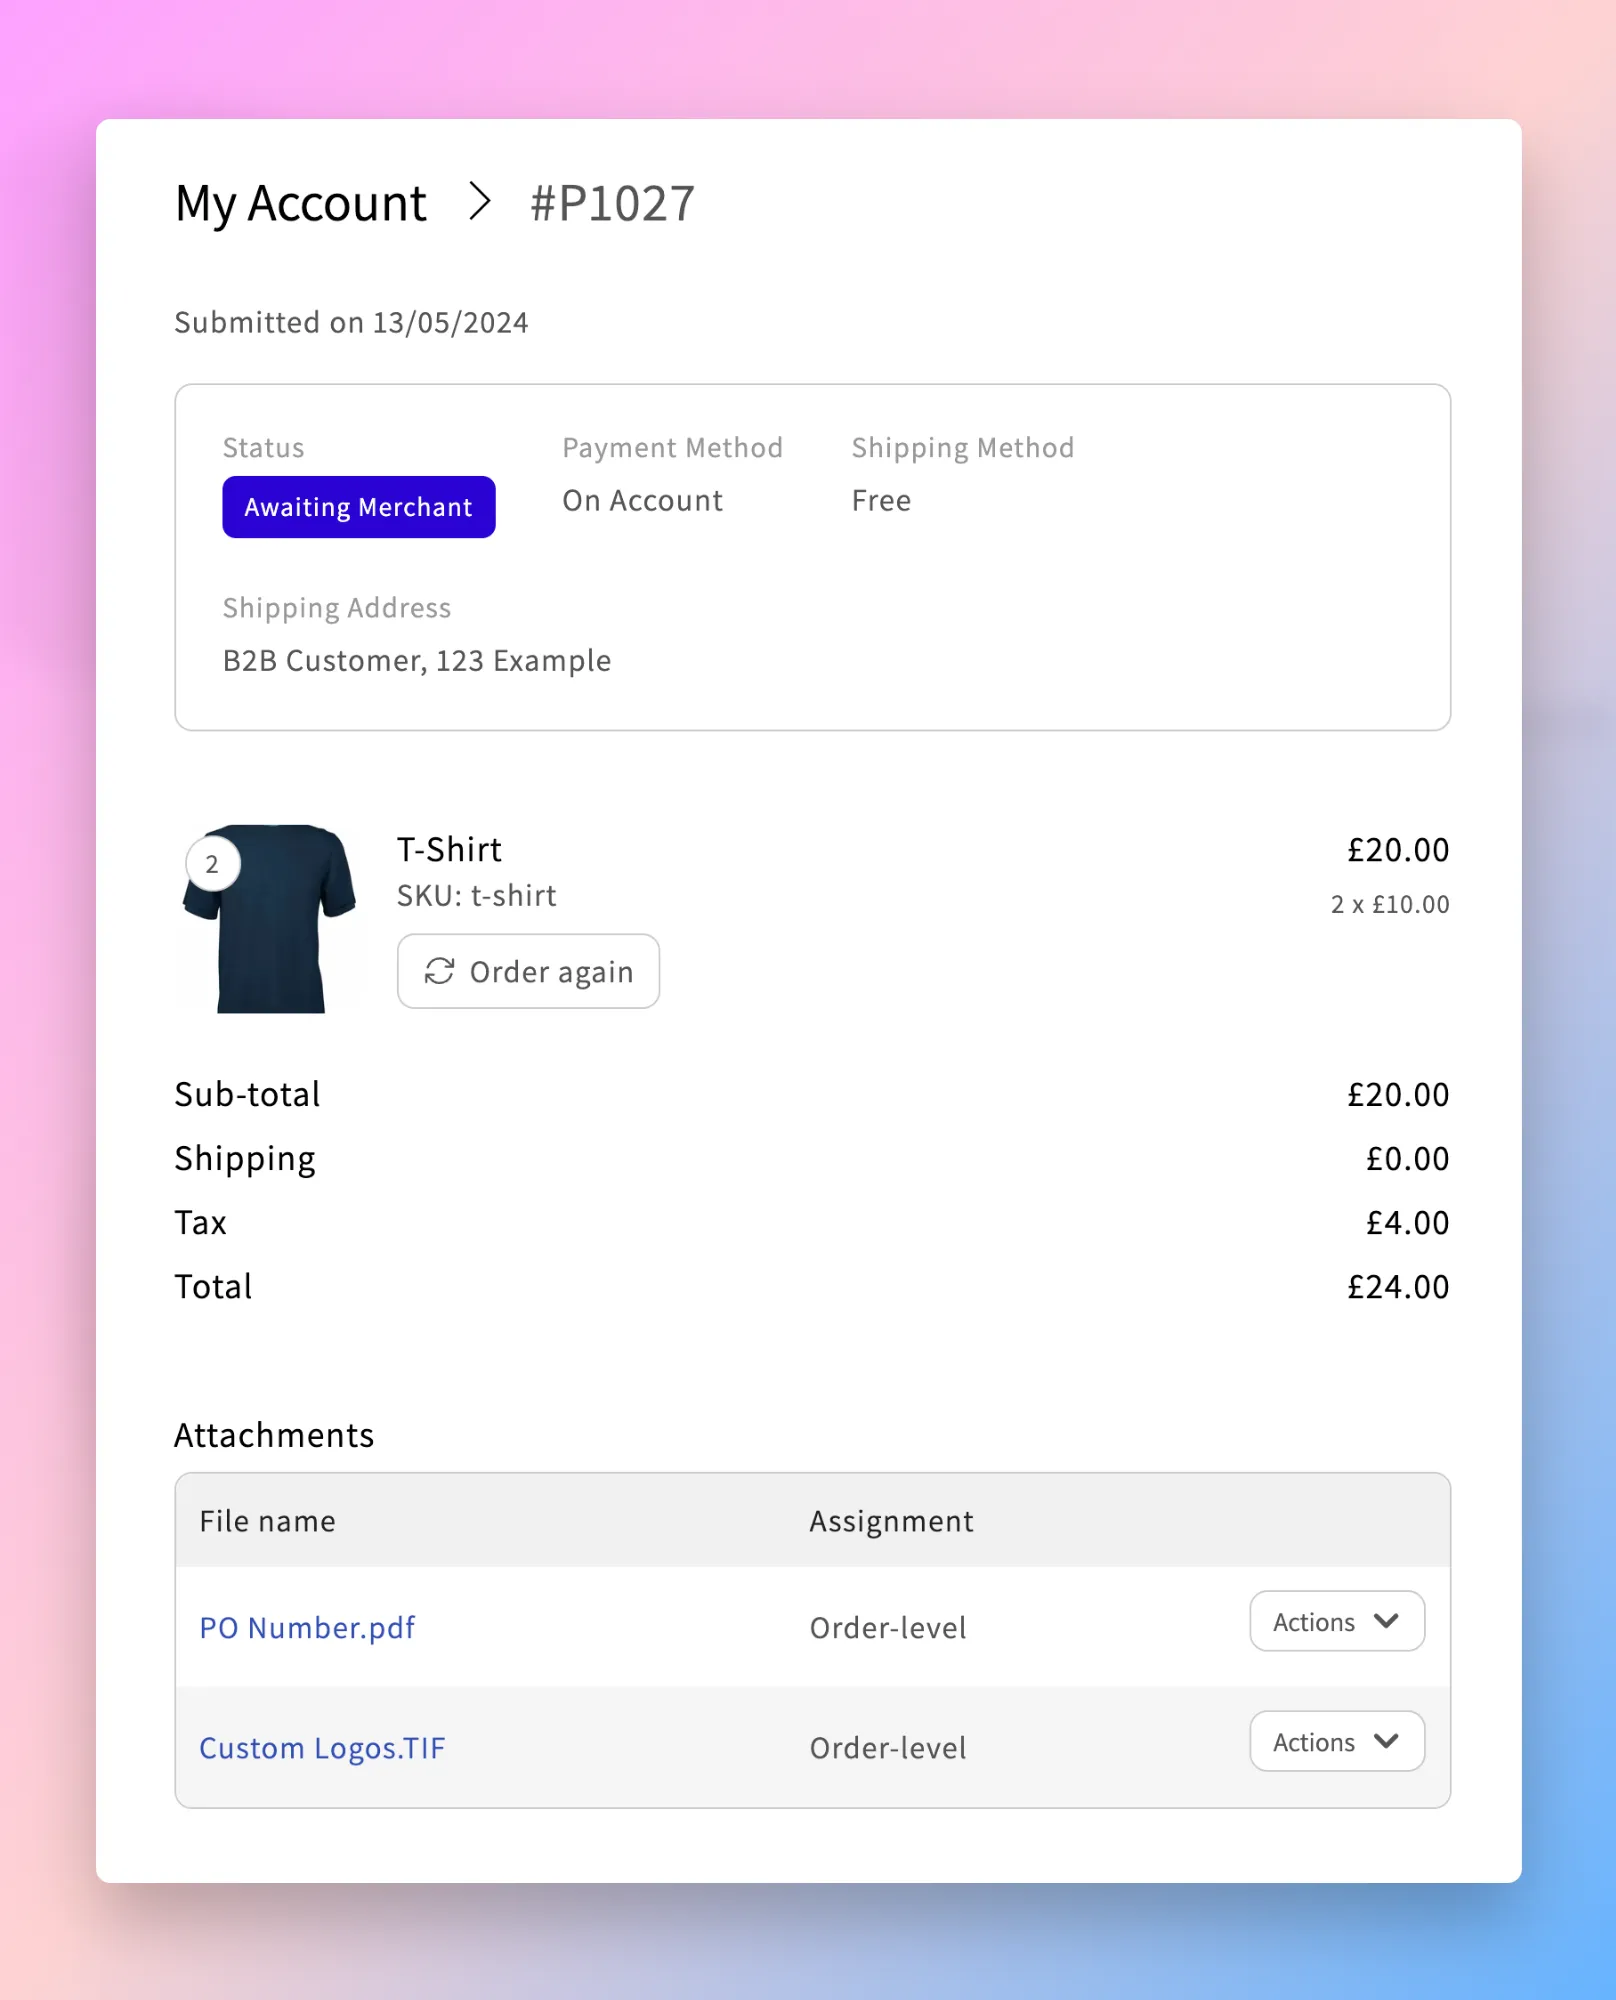
When the order is completed, any files uploaded to an order will then display in their My Account Interface area against the order they have just placed. The customer can then easily download any files associated against the order.
Enabling file uploads
The file upload feature works by adding special code to the SparkLayer Core Script that lets you customise how you accept files from your customers. To get started, you can use our sample code below.
Updating the display You can update the default display by adding code to your Core Script. Learn more about how to update display settings on SparkLayer
/* Add the below code into the SparkLayer Core Script */
/* Please refer to our help guide on how to do this */
checkoutCustomElements: [
	{
		translations: {
			en: {
				title: "File Upload",
				detail: "Files must not be larger than 10MB. You can upload between 1 and 4 files"
			},
		},
		name: "file-upload",
		attributes: {
			type: "file",
			required: false,   // Optional. Default: false
			minlength: 1,     // Optional. Default: 1
			maxlength: 4,     // Optional. Default: 20
			maxsize: '10MB',  // Optional. Default: 20MB, Must be a number followed by `B`, `KB` or `MB`
			fileextensions: [ // Optional. Default: ['txt', 'csv', 'pdf', 'json', 'png', 'jpeg', 'gif', 'webp', 'svg', 'psd', 'xls', 'xlsx', 'ods', 'fods', 'ppt', 'pptx', 'odp', 'fodp', 'doc', 'docx', 'odt', 'fodt']
			  'png',
			  'txt',
			  'pdf',
			  'xls'
			]
		}
	}
],

/* End of code */
To customise how you accept files from your B2B customers, you can adjust the special settings:
Setting | Description |
|---|---|
required | Setting as true will force the customer to have to upload a file |
minlength | This sets the minimum number of files the customer must upload (e.g. entering 1 would force them to upload 1 file) |
maxlength | This sets the maximum number of files the customer must upload (e.g. entering 4 would prevent them from uploading more than 4 files) |
maxsize | By default, SparkLayer sets a maximum file size of 20MB and this limit cannot be increased. If you'd prefer to limit file size, you can adjust this. For example entering 10MB would set a maximum file size limit of 10MB |
fileextensions | If you'd prefer to limit the file types your customers can upload, you can specify file extensions. By default, SparkLayer will support all the following file extensions. ['txt', 'csv', 'pdf', 'json', 'png', 'jpeg', 'gif', 'webp', 'svg', 'psd', 'xls', 'xlsx', 'ods', 'fods', 'ppt', 'pptx', 'odp', 'fodp', 'doc', 'docx', 'odt', 'fodt'] |
translations | You can edit the default text that shows for customers by editing the default language string (see example above). |
Retrieving file uploads
Due to how files are stored within SparkLayer, there are some very specific methods in which to download any files that have been uploaded. When a B2B customer uploads a file against an order, there are 3 ways to retrieve the files that have been uploaded.
Method | Details |
|---|---|
Customer | The customer themselves can login to their account and download the attachments from their order |
Sales Agent | As a user with access to the Sales Agent Ordering tool, they can login on behalf of the customer, navigate to their account and download any attachments. |
API | Via the SparkLayer Files API, file uploads will be associated with order data and this can then be routed into a back-office (e.g. an ERP). For more details on how this works, please speak to our support team. |
How file upload are referenced
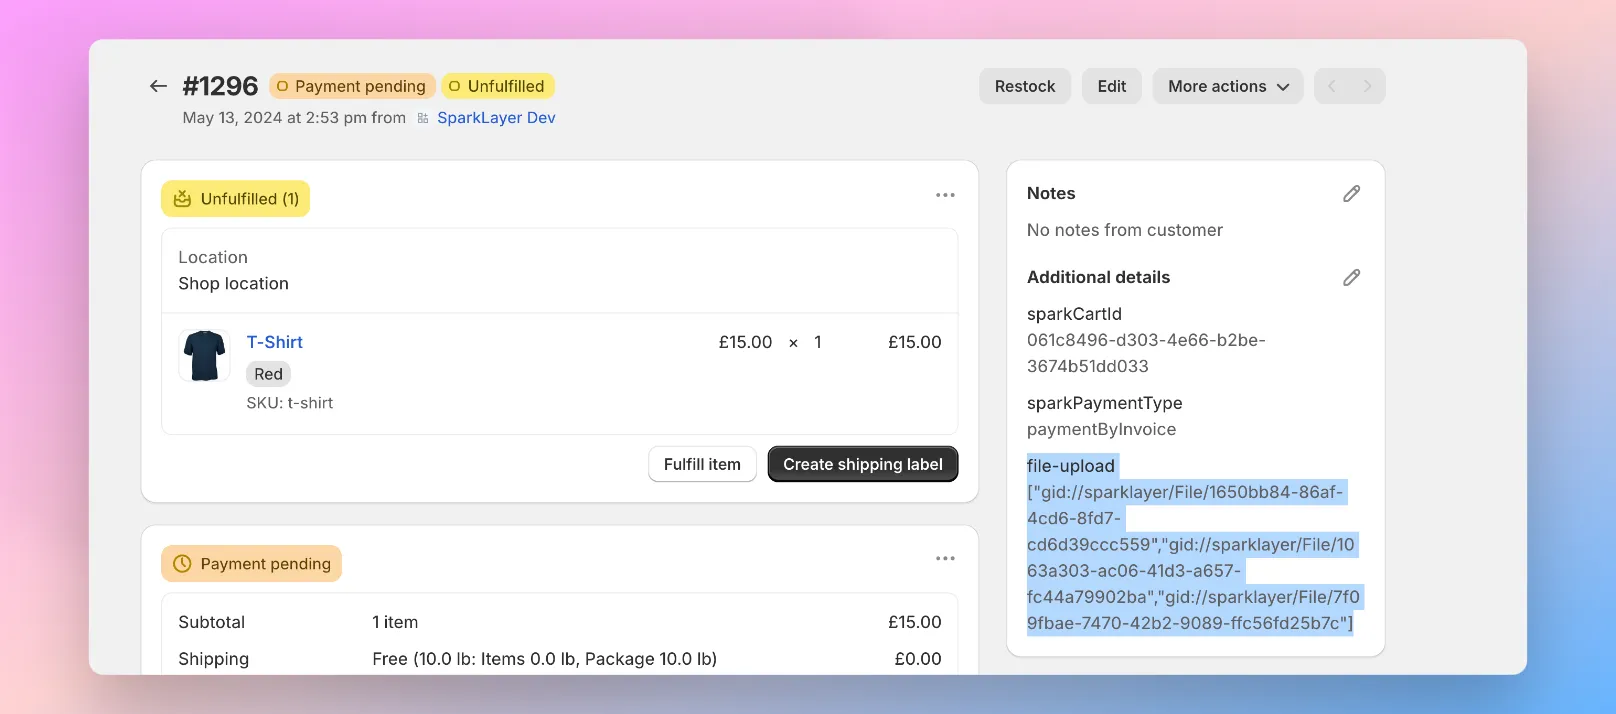
When a customer uploads a file and the order arrives into Shopify, files will be referenced within the file-upload section on the top right of an order detail. If you'd prefer to use a different naming convention to file-upload, you can modify this within the checkout code sample above name: "file-upload"
Please note This will include a 'raw link' to the file and it's important to note that this cannot be accessed via Shopify. Please refer to our steps above on the methods to retrieve files that have been uploaded.
File upload per line item
Please note This is an advanced configuration of SparkLayer and will require a developer to implement on a store that requires this feature. Please refer to our JavaScript SDK for full details.
The file upload per "line item" feature allows for item-level customisation control, enabling B2B customers to clearly outline their order requirements and streamline the order process.
Once enabled, the B2B customer will see a special field on the product page where they can upload relevant files. The design and layout of this field can be configured as detailed in JavaScript SDK
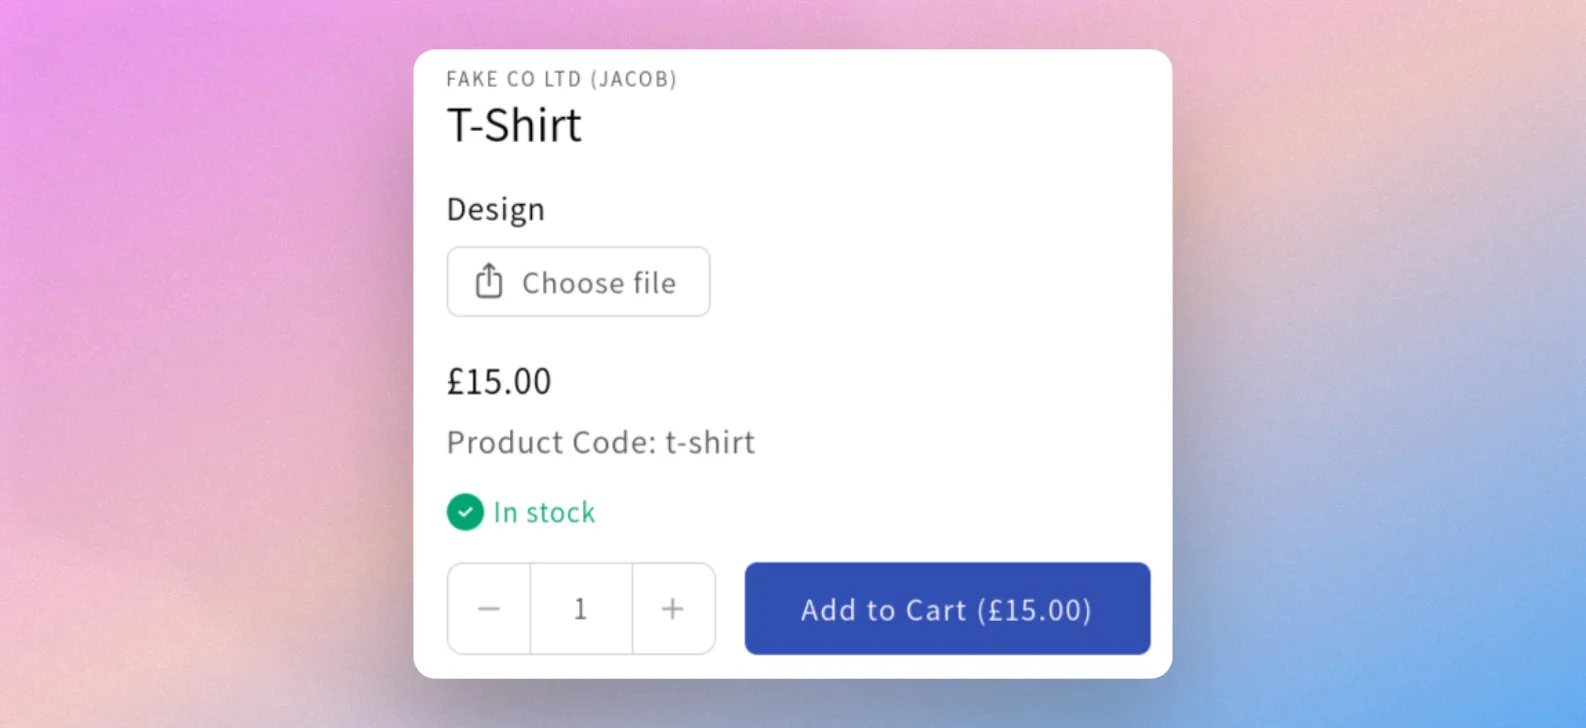
In some instances, there may be a need for more than one file upload section. When the files are uploaded to the product page, they will appear above the "Choose file" button.
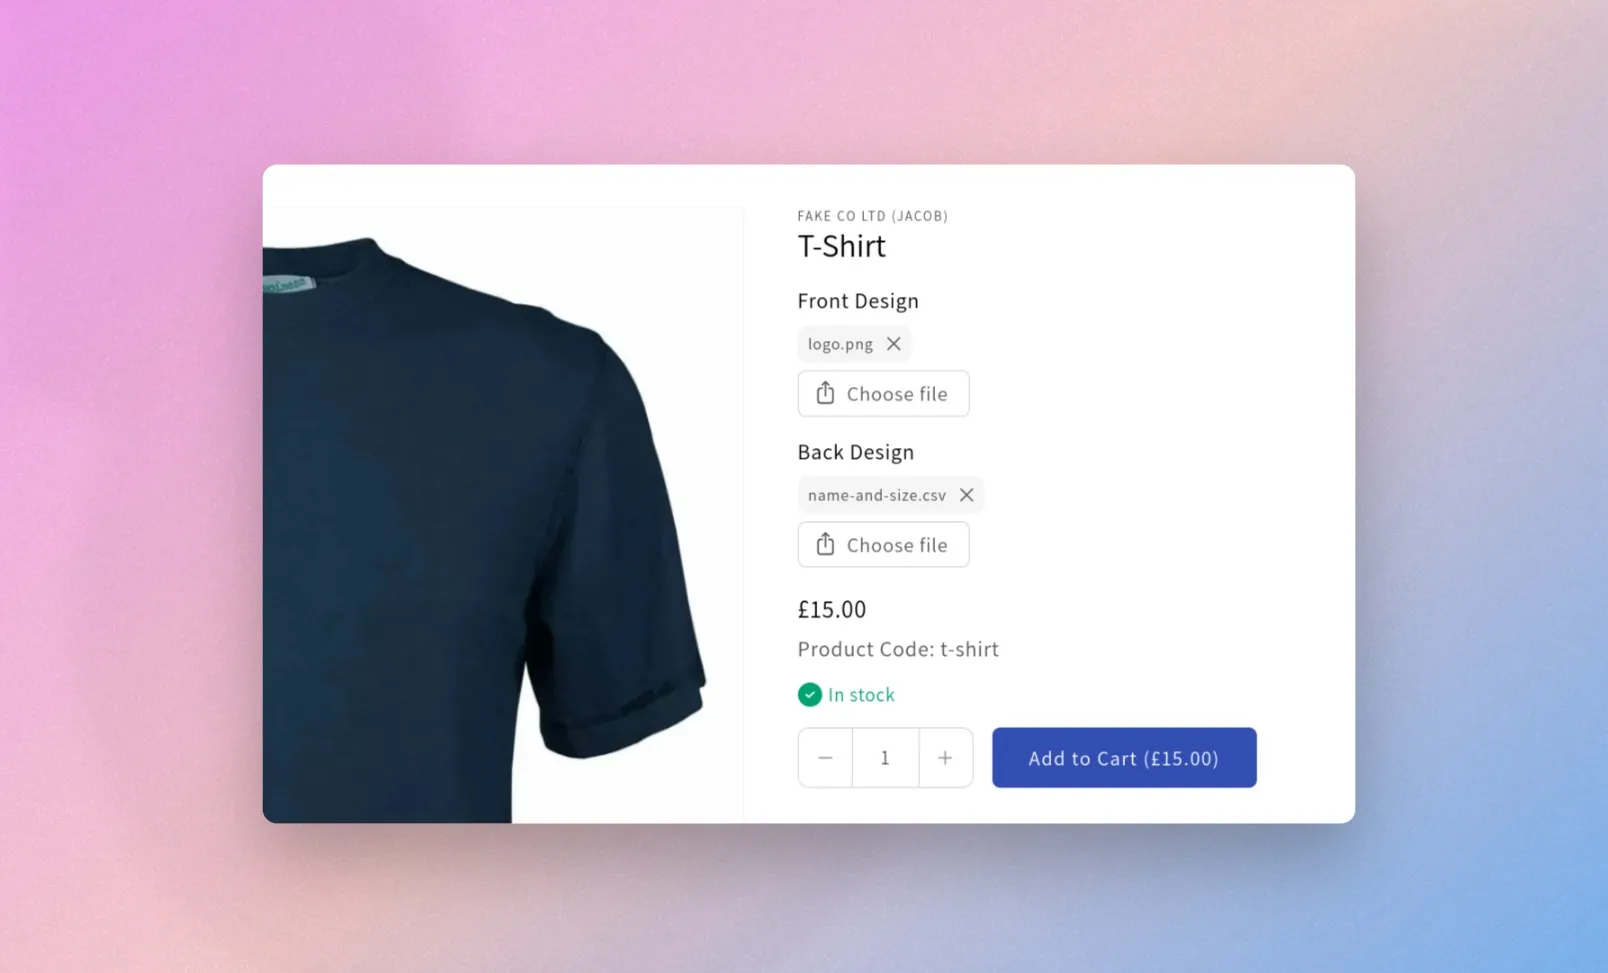
The files uploaded by the customer will then show in the cart as separate line items.
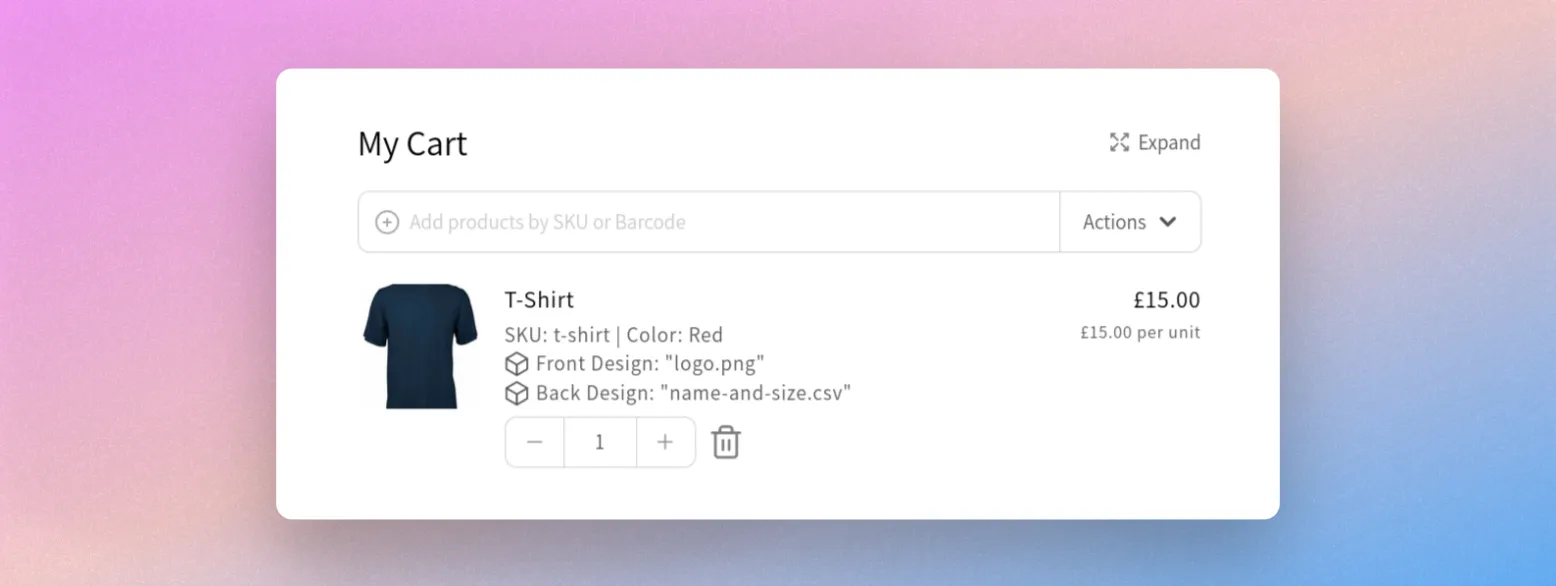
After "line item" file uploads have been added there is still the option to enable the "checkout-level" file upload feature too (see "File upload at checkout" above). Whilst the line item file upload option may be ample customisation for some customers, enabling checkout-level file uploads will allow for any order-level attachments to be added such as a "Purchase Order".
When the order is completed, all files uploaded to an order (at line item and checkout level) will then display in their My Account Interface area against the order they have just placed. The customer can then easily download any files associated against the order.
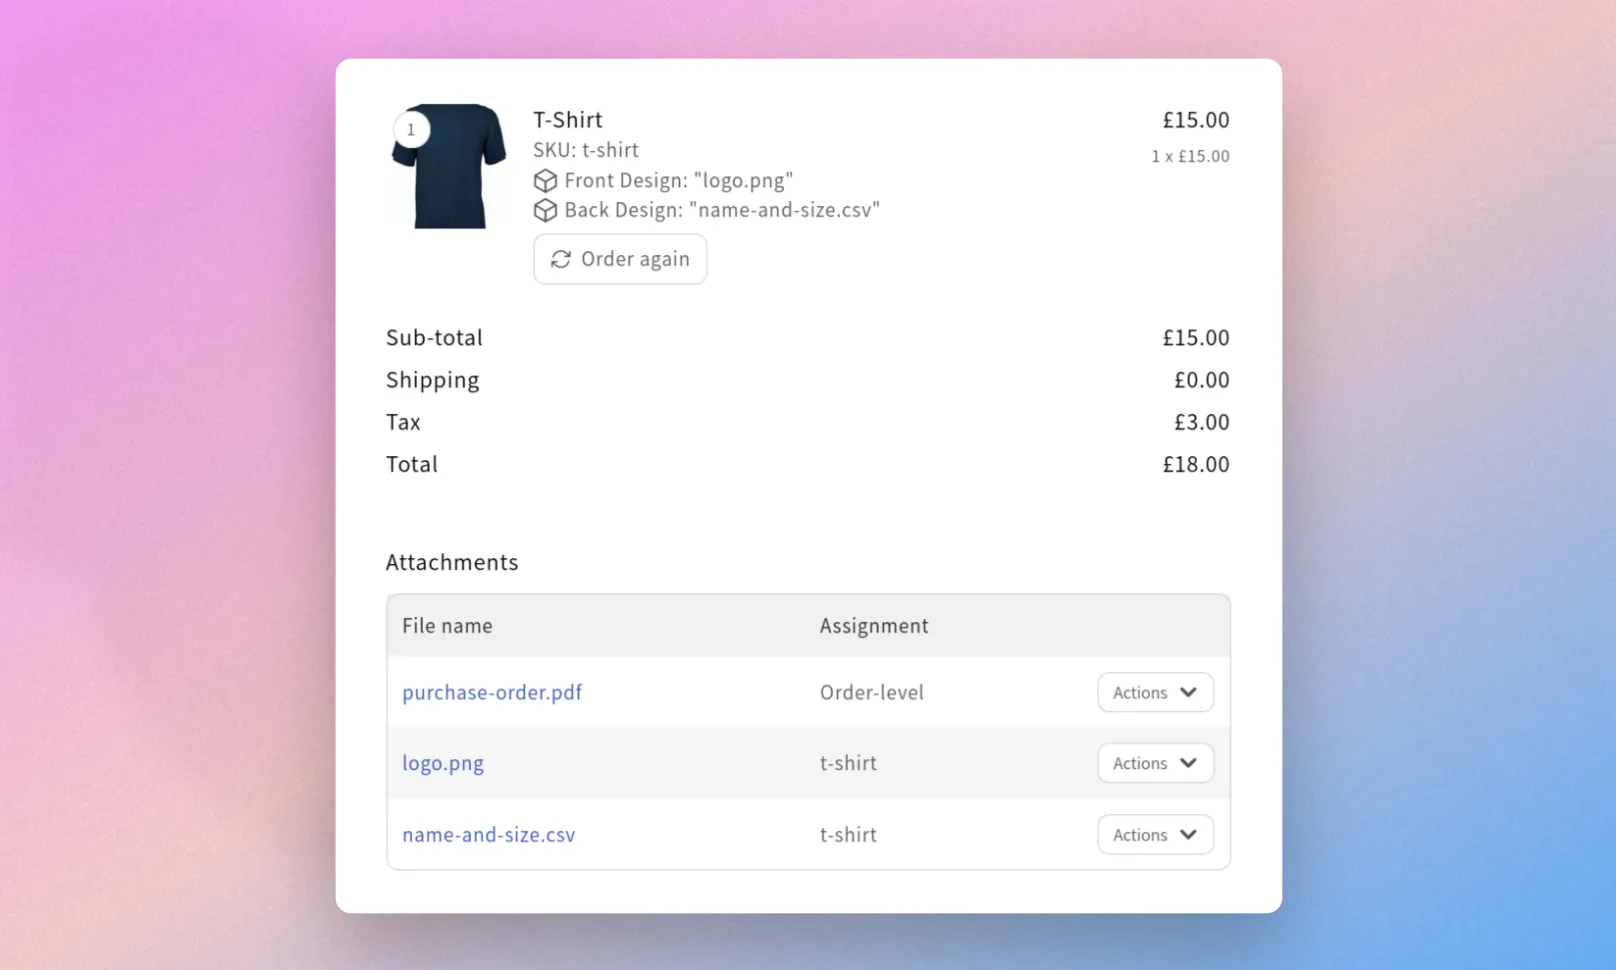
Enabling file uploads for line items To implement this line item file upload feature, please refer to our technical guide here.
Discounts & promotions
SparkLayer supports the ability to have discounts and promotions applied during the checkout and these can either be redeemed via discount codes, or applied "automatically" to the customer's order.
The SparkLayer Discount Engine unlocks a range of discount rules including:
- Order-level discounts: eg, spend $1,000 and get 10% off, spend $2,000 and get 15% off
- Percentage and fixed discounts: eg, 20% off an order total, $100 off an order total
- Coupon codes: eg, enter code NEWCUSTOMER and get 5% off
- Scheduled discounts: eg, start discount today and end it on a specific date and time
- Customer-specific discounts: eg, only allow customer group ‘b2b-vip’ to qualify for the discount
- And more
Learn more about discounts You can see a full overview of what’s possible with discounts in our guide here.
The "Additional Information" field (PO Number)
The Additional Information field is useful if you want to capture additional details from a customer whilst their placing an order.
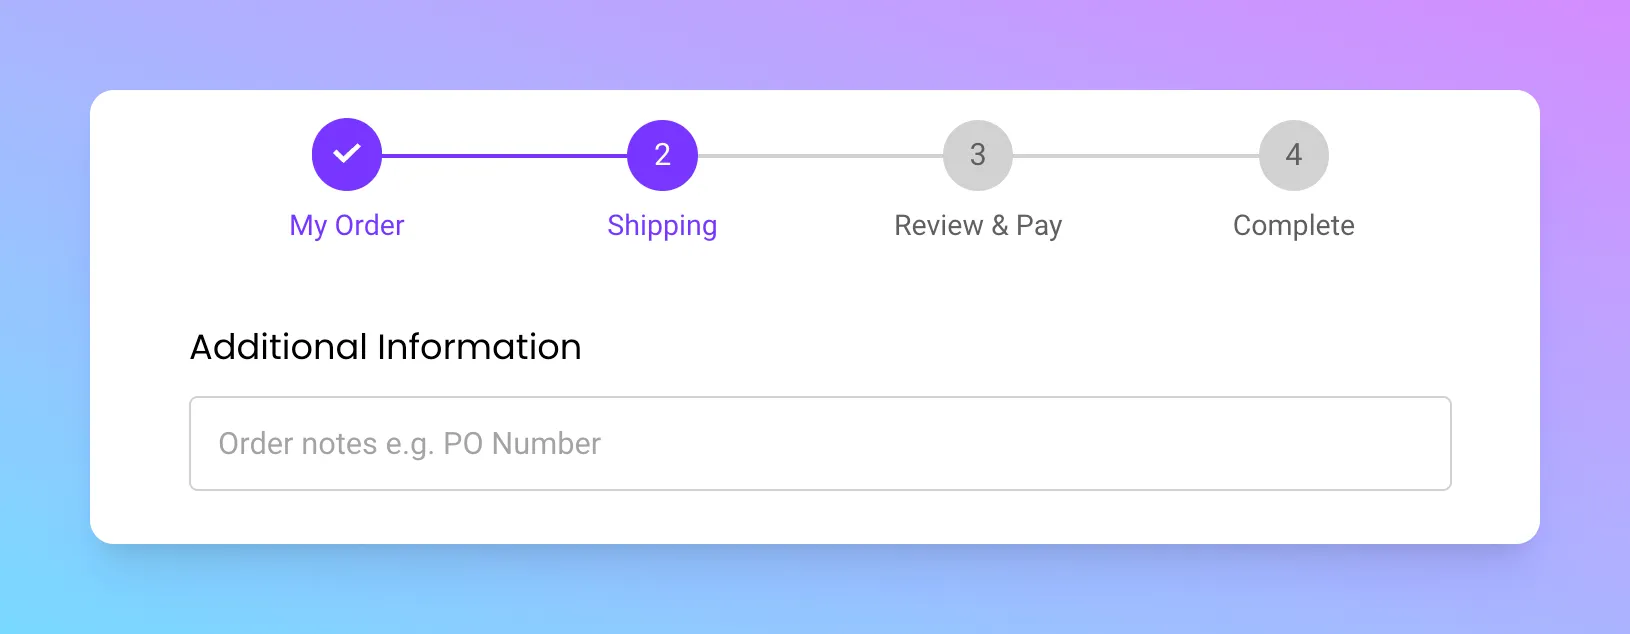
Typical use-cases include capturing a Purchase Order number (sometimes referred to as PO number), delivery instructions, or instructions.
When completed by a customer, the data will then show within the Shopify order under the Notes section (this can also be sent to a backend system using the SparkLayer API).
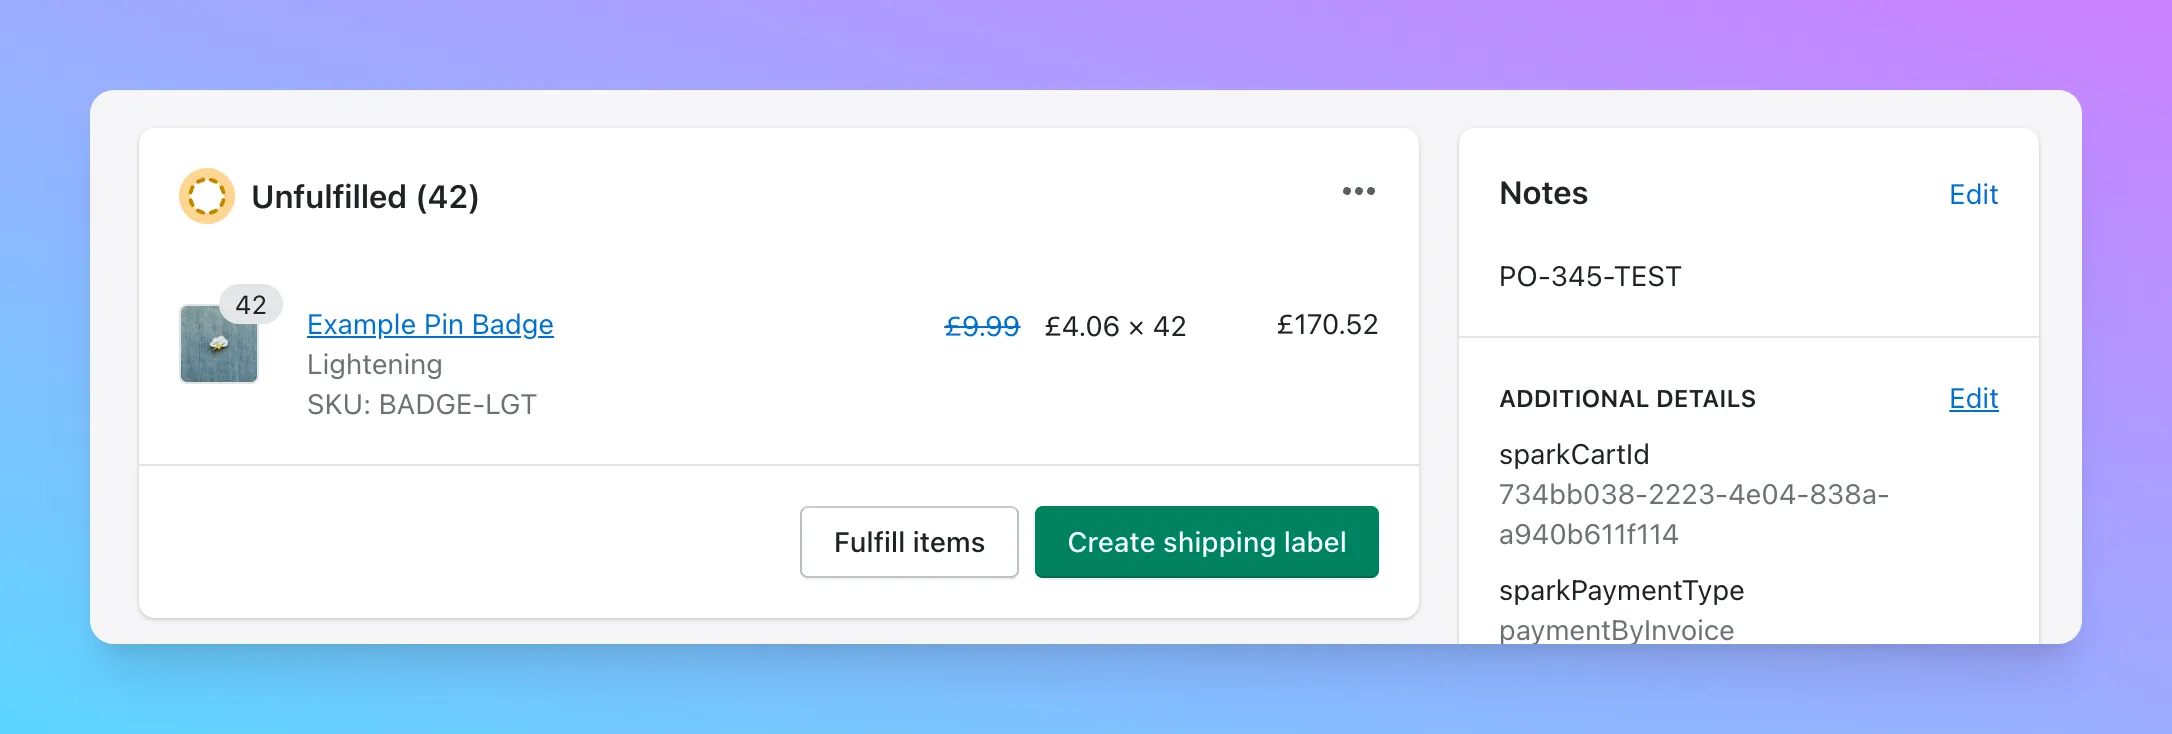
Please note The additional information is a separate field to the 'custom checkout fields' detailed above. The Additional Information field is also limited to 512 characters in total
Make "Additional information" mandatory
You can force customers to complete the 'Additional information' field before proceeding to place their order.
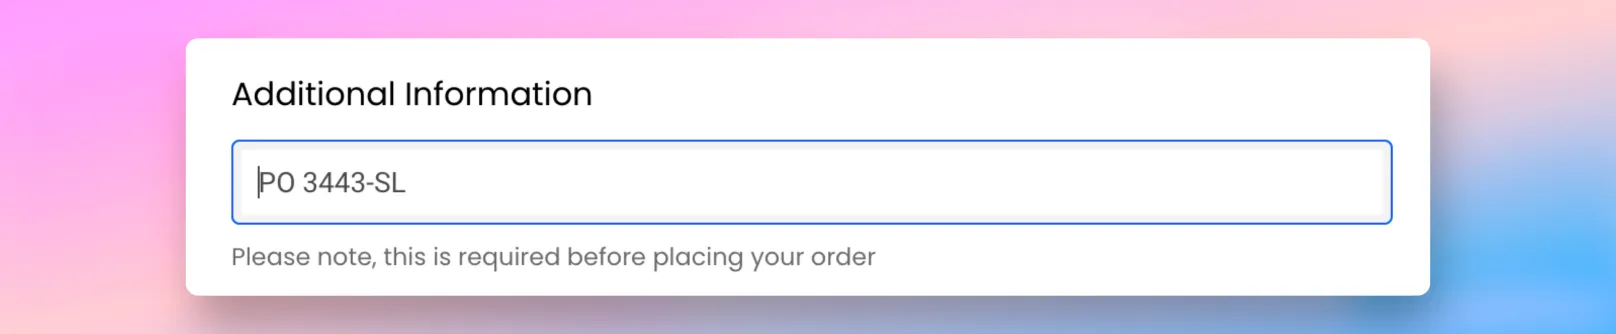
Updating the display You can update the default display by adding code to your Core Script. Learn more about how to update display settings on SparkLayer
/* Add the below code into the display object within the SparkLayer Core Script */
/* Please refer to our help guide on how to do this */
display: {
  customerReferenceRequired: true,
},
/* End of code */
Updating language and text You can update the default text by adding code to your Core Script. Learn more about how to update text on SparkLayer.
/* Add the below code into the SparkLayer Core Script */
/* Please refer to our help guide on how to do this */
translations: {
  en: {
    "cart.checkout.notes.label": "Additional Information",
    "cart.checkout.notes.placeholder": "Order notes e.g. PO Number",
    "cart.checkout.notes.helper-text": "Please note, this is required before placing your order", /* Only shown if the field is set to required */
    "cart.checkout.notes.default-helper-text": "", /* Add a helper message below the form field */

  }
},
/* End of code */
Limiting characters of the "Additional information" field
It's possible to set a character limit for the additional information field should you have requirements to restrict what can be added.
Updating the display You can update the default display by adding code to your Core Script. Learn more about how to update display settings on SparkLayer
/* Add the below code into the display object within the SparkLayer Core Script */
/* Please refer to our help guide on how to do this */
display: {
  customerReferenceMaxLength: 512, /* update 512 as required */
},
/* End of code */
Hiding the "Additional information" field
Alternatively, if you'd prefer to hide the additional information field from showing, you can update this via the SparkLayer Core Script.
Updating the display You can update the default display by adding code to your Core Script. Learn more about how to update display settings on SparkLayer
/* Add the below code into the display object within the SparkLayer Core Script */
/* Please refer to our help guide on how to do this */
display: {
  customerReferenceHidden: true,
},
/* End of code */
Custom payment messages
On the final step of the My Cart Interface, Review & Pay, it's possible to display a "custom payment messages" that let you add additional details about a payment method. For example, if a customer is paying by "Pay by Invoice", you could add some additional text to inform them on how this process works.
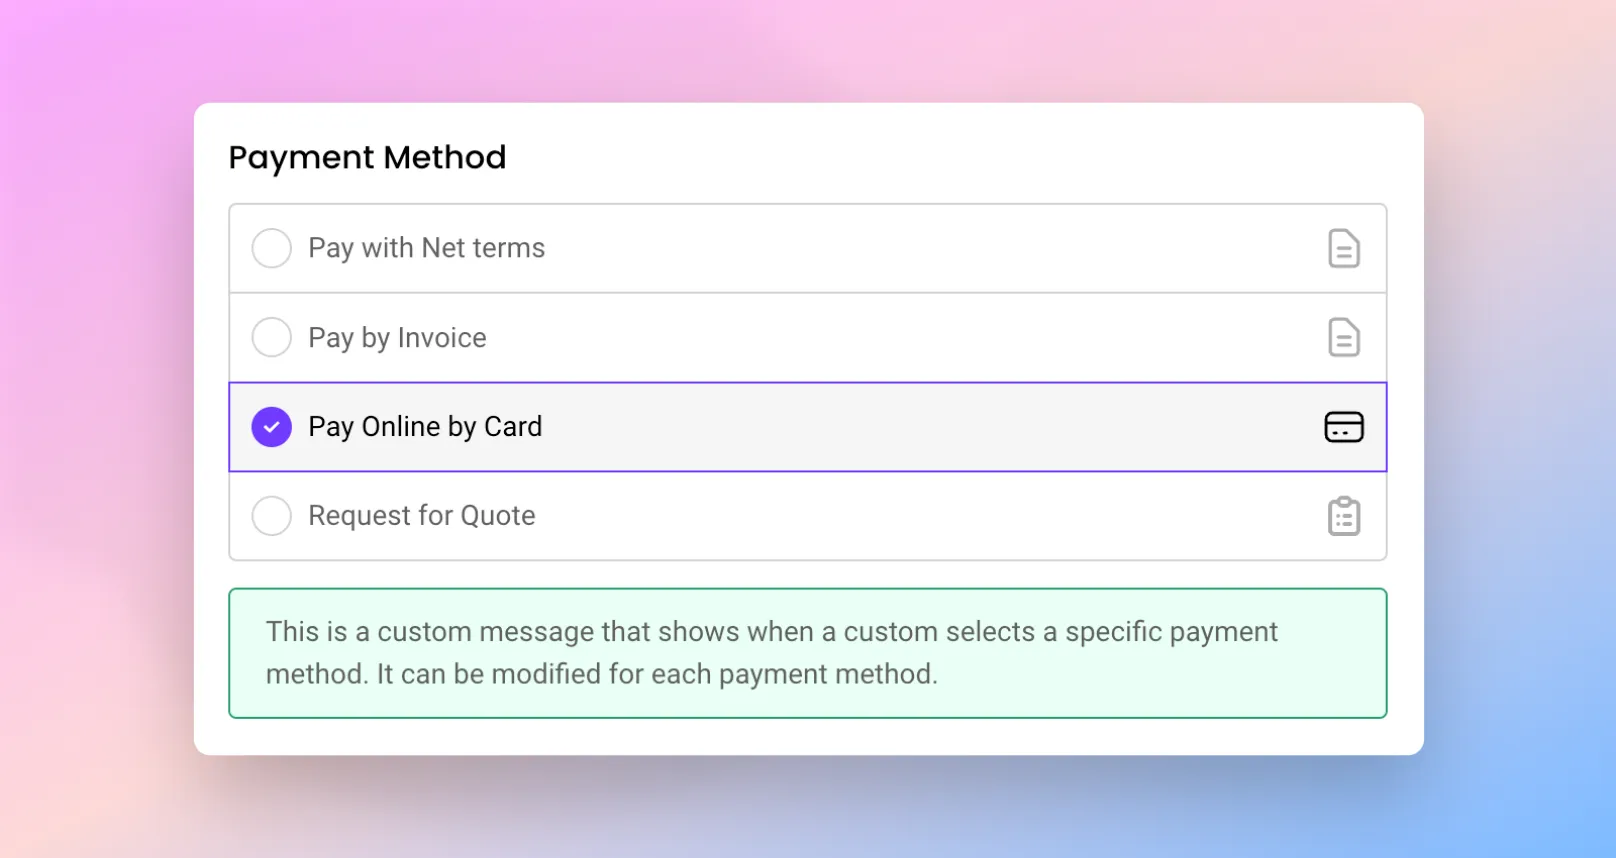
The "custom payment message" works by adding a special code snippet to the SparkLayer Core Script that lets you define the text you want to show.
Updating language and text You can update the default text by adding code to your Core Script. Learn more about how to update text on SparkLayer.
/* Add the below code into the SparkLayer Core Script */
/* Please refer to our help guide on how to do this */
translations: {
  en: {
    "cart.checkout.payment-providers.paymentByInvoice.message": "This is a message for Payment by Invoice",
    "cart.checkout.payment-providers.upfrontPayment.message": "This is a message for Pay Online by Card",
    "cart.checkout.payment-providers.paymentOnAccount.message": "This is a message for Pay on Account",
    "cart.checkout.payment-providers.quote.message": "This is a message for Request for Quote",
  }
},
/* End of code */
Please note It's important to note that this text will show to all customers during the checkout process and it's not possible to vary it based on who the customer is.
Custom checkout message
On the final step of the My Cart Interface, Review & Pay, it's possible to display a "custom checkout message" that lets you inform customers of any special notes or information they need to be aware of. It's a great way to highlight information about shipping, payment, or anything else!
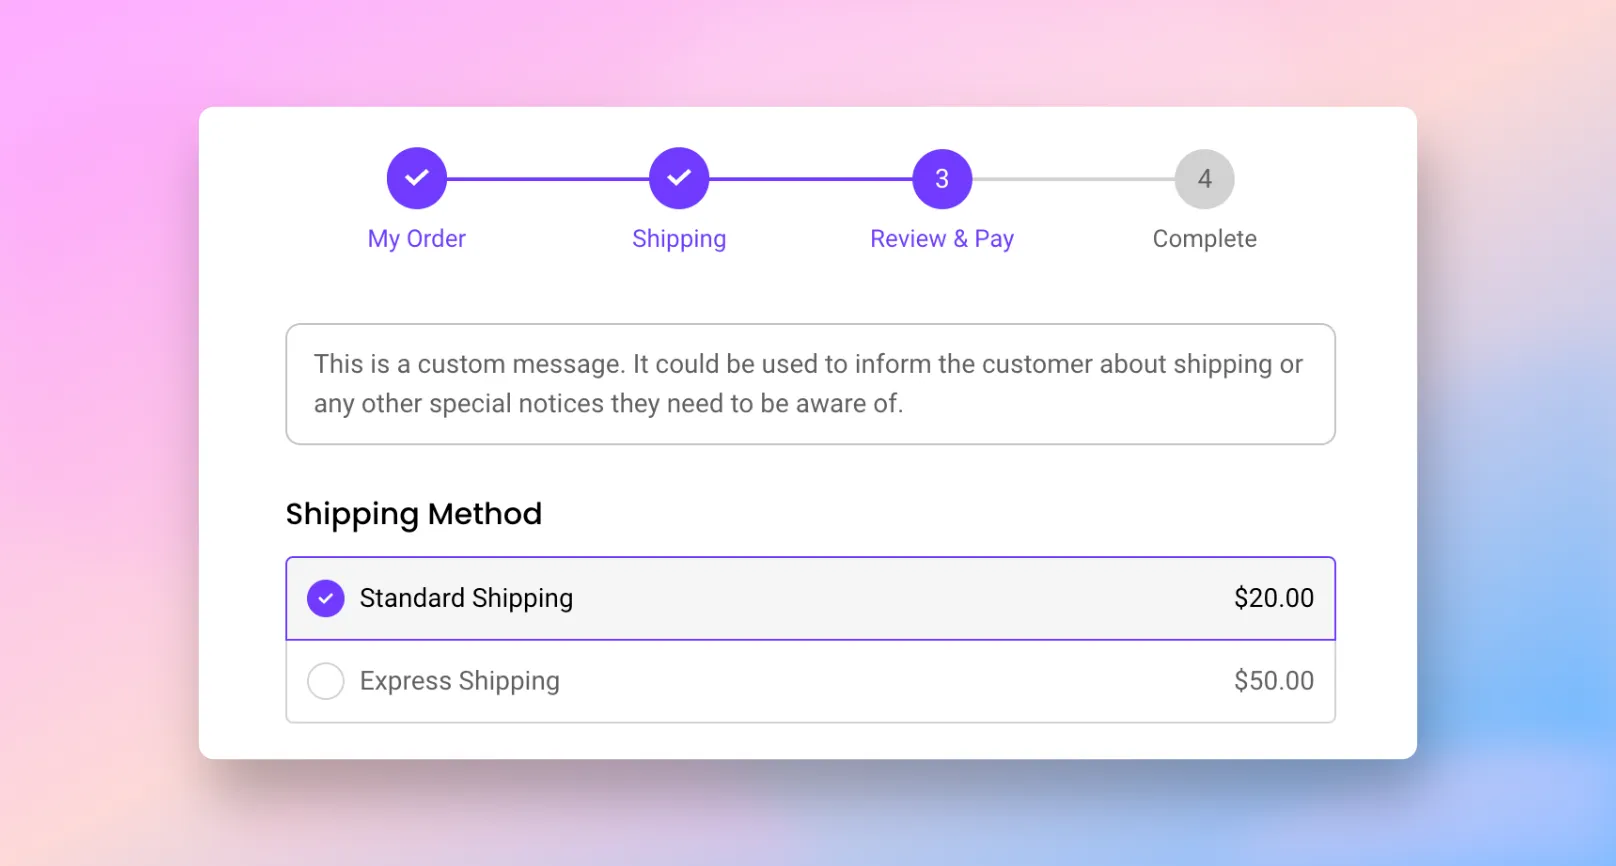
The "custom checkout message" works by adding a special code snippet to the SparkLayer Core Script that lets you define the text you want to show.
Updating language and text You can update the default text by adding code to your Core Script. Learn more about how to update text on SparkLayer.
/* Add the below code into the SparkLayer Core Script */
/* Please refer to our help guide on how to do this */
translations: {
  en: {
    "cart.checkout.review-step.custom-message": "Add your custom checkout message here",
  }
},
/* End of code */
Please note It's important to note that this text will show to all customers during the checkout process and it's not possible to vary it based on who the customer is.
Styling the message

If you'd like to customise how the message looks, you can do this by adding special CSS to your website. Simply add the below CSS to your website's CSS file and you can then set styling such as colours and spacing.
<style>
:root {
  --spark-message-checkout-review-message-color: #555;
  --spark-message-checkout-review-message-background: #fff;
  --spark-message-checkout-review-message-padding: 0.5em 0.75em;
  --spark-message-checkout-review-message-alignment: left;
  --spark-message-checkout-review-message-border: 1px solid #CCCCCC;
}
</style>
Search
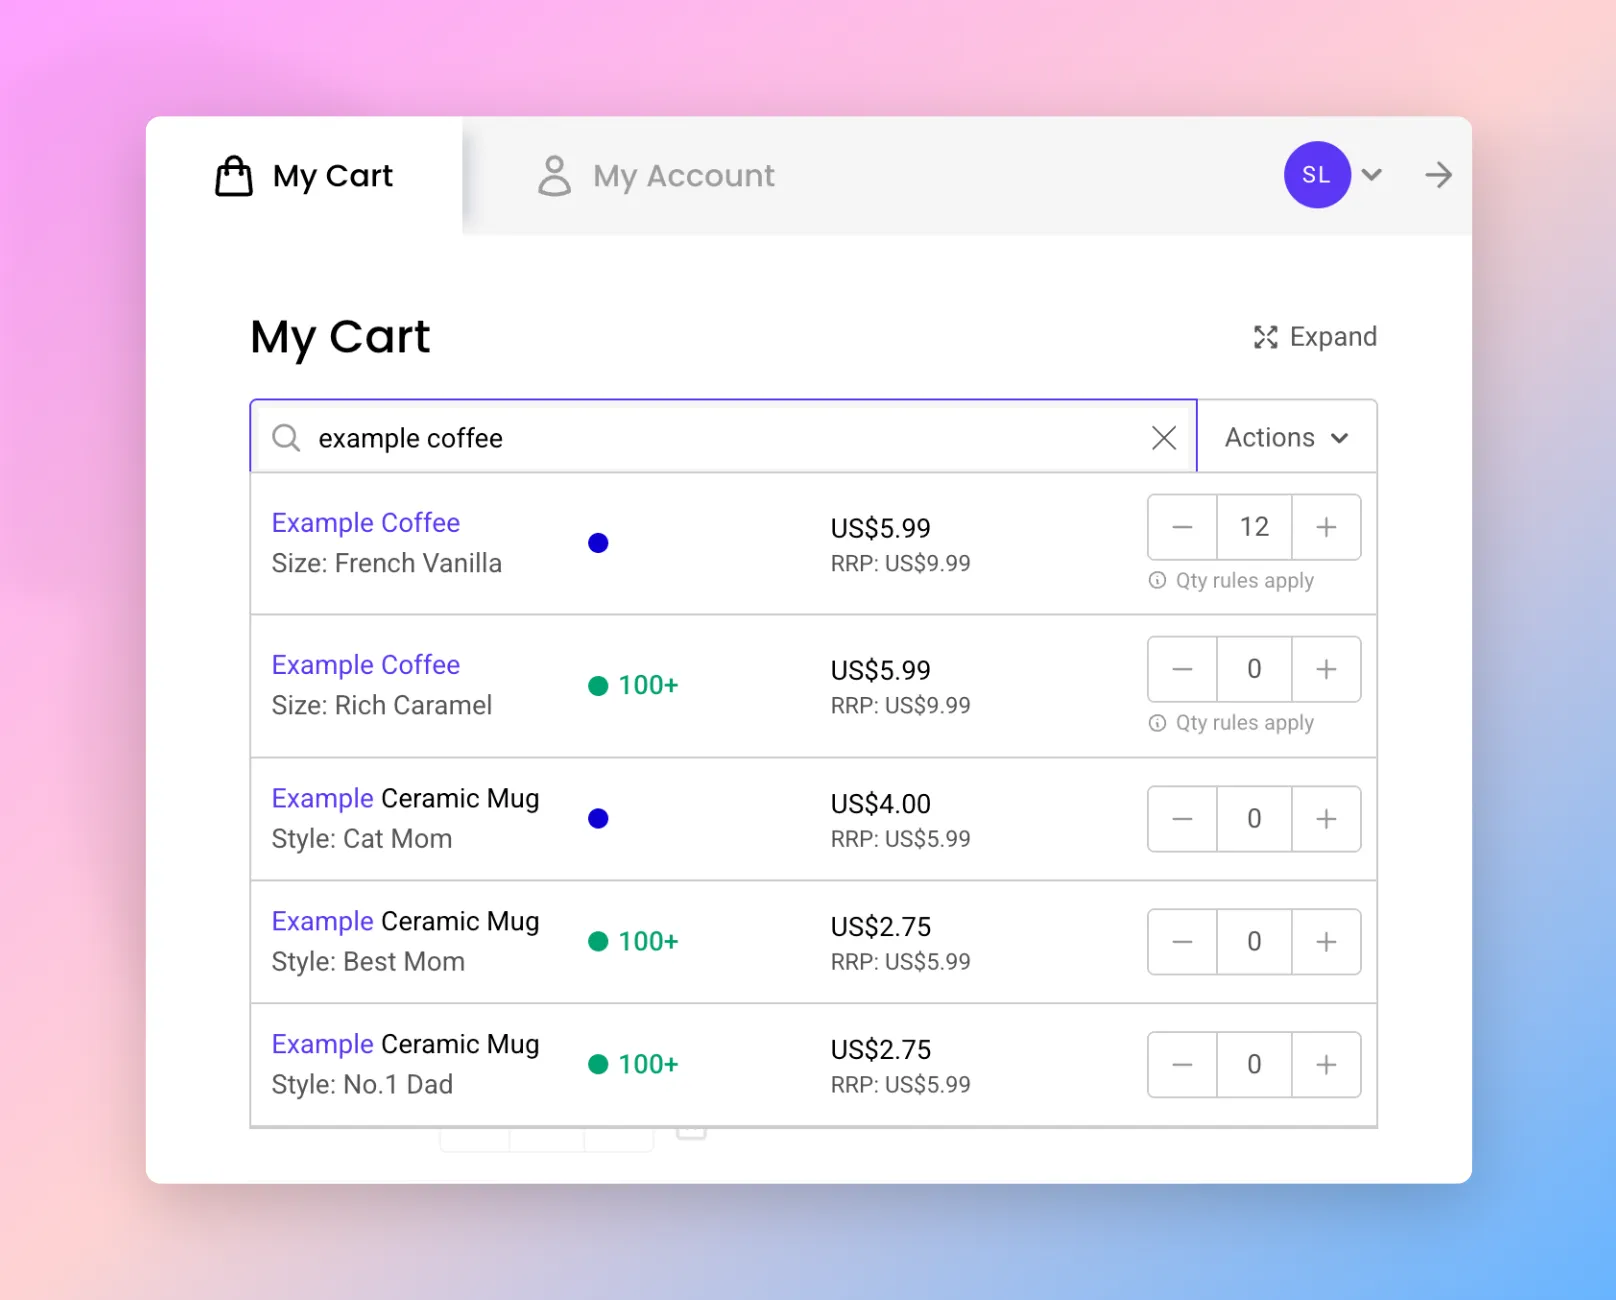
SparkLayer has a built-in tool allowing customers to quickly add items to an order, directly from the My Cart Interface. You can learn more in our guide here.
Terms and conditions
When customers checkout via the SparkLayer My Cart Interface, they'll be asked to confirm the store's terms and conditions before completing their order.

By default, the terms and conditions link will point to a URL of policies/terms-of-service but it's possible to change this via the SparkLayer Core Script.
Updating the display You can update the default display by adding code to your Core Script. Learn more about how to update display settings on SparkLayer
/* Add the below code into the SparkLayer Core Script */
/* Please refer to our help guide on how to do this */
termsAndConditionsLink: "/policies/terms-of-service",
/* End of code */You can customise the link based on a customer's tag by using code within your Shopify store.
/* Add the below code into the SparkLayer Core Script */
/* Please refer to our help guide on how to do this */
{% if customer.tags contains 'b2b' %}
  termsAndConditionsLink: '/policies/b2b-terms',
{% elsif customer.tags contains 'b2b-2' %}
  termsAndConditionsLink: '/policies/b2b-2-terms',
{% elsif shop.locale == "fr" %}
  termsAndConditionsLink: '/policies/fr-terms-and-conditions',
{% else %}
  termsAndConditionsLink: '/policies/terms-and-conditions',
{% endif %}
/* End of code */
If your store is set up with multiple languages, you can also configure the code to show a different link based on the customer's location
/* Add the below code into the SparkLayer Core Script */
/* Please refer to our help guide on how to do this */
{%- if shop.locale == "fr" -%}
  termsAndConditionsLink: '/policies/fr-terms-and-conditions',
{%- else -%}
  termsAndConditionsLink: '/policies/terms-and-conditions',
{%- endif -%}
/* End of code */Updating language and text You can update the default text by adding code to your Core Script. Learn more about how to update text on SparkLayer.
/* Add the below code into the SparkLayer Core Script */
/* Please refer to our help guide on how to do this */
translations: {
  en: {
    "cart.checkout.terms.start": "I agree to the ",
    "cart.checkout.terms.link": "terms and conditions",
    "cart.checkout.terms.end": " ",
  }
},
/* End of code */
Payment methods
Please refer to the Payment Methods guide for more information.
Tax & shipping messaging
Tax & shipping To learn more about how SparkLayer handles tax and shipping, see our guide here.
When a customer proceeds through the checkout, they'll be notified about tax and shipping with messaging beneath the main call to action.


If you'd like to modify what is shown here, you can do so by updating the default language within your store.
Updating language and text You can update the default text by adding code to your Core Script. Learn more about how to update text on SparkLayer.
/* Add the below code into the SparkLayer Core Script */
/* Please refer to our help guide on how to do this */
translations: {
  en: {
    "cart.tax-shipping-note": "Tax and shipping costs calculated during checkout",
    "cart.tax-shipping-message": "Tax and shipping costs shown on next step",
  }
},
/* End of code */
Tax ID Requirements
Some countries require you to collect your customer’s Tax ID or equivalent during checkout. This helps ensure orders comply with local tax laws and avoids delays or fines at customs. Learn mroe
The order complete screen
You can modify the confirmation screen that shows to the customer by adding the below to the language overwrites within the SparkLayer Core Script.
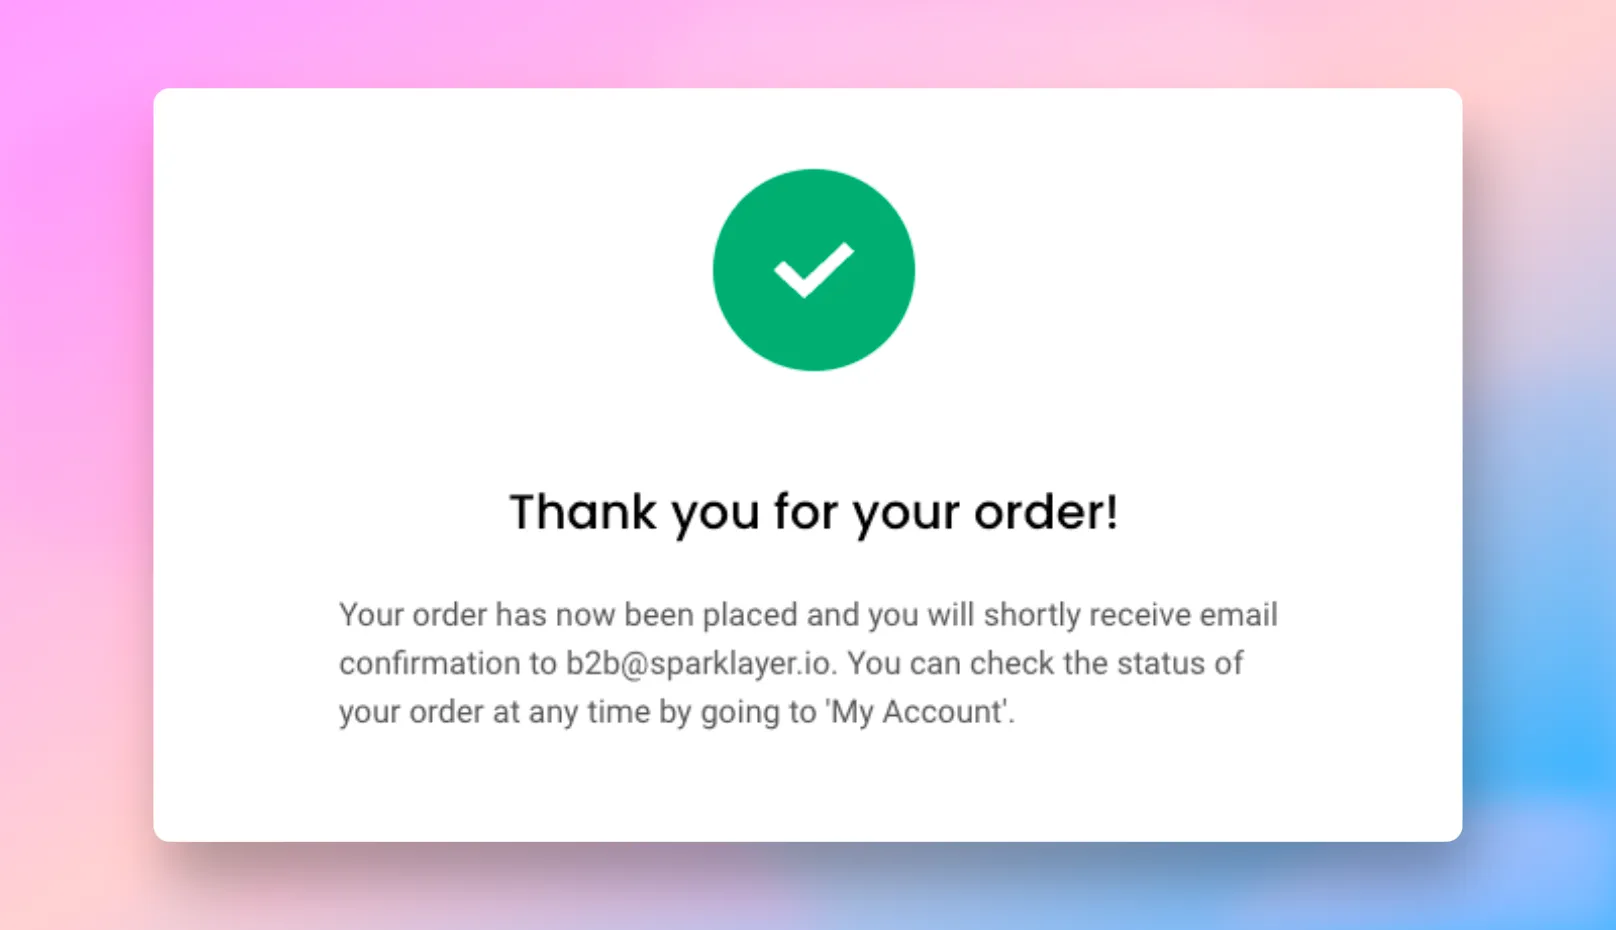
Updating language and text You can update the default text by adding code to your Core Script. Learn more about how to update text on SparkLayer.
/* Add the below code into the SparkLayer Core Script */
/* Please refer to our help guide on how to do this */
translations: {
  en: {
    "cart.thanks.payment.main": "Thank you for your order!",
    "cart.thanks.payment.blurb": "Your order has now been placed and you will shortly receive email confirmation to {email}. You can check the status of your order at any time by going to 'My Account'.",
    "cart.thanks.quote.main": "Thank you for requesting a quote!",
    "cart.thanks.quote.blurb": "We can confirm that your request for a quote has been received and we'll be in touch once our team has reviewed it.",
  }
},
/* End of code */
Order limits (minimum and maximum order values)
It's possible to set minimum and maximum order values that a customer has to meet before being able to place an order. Please refer to our full guide here.
Showing custom content (using "slots")
Custom Slots (or "Targets") allow you to enhance the SparkLayer My Cart Interface by adding your own custom code in predefined areas.
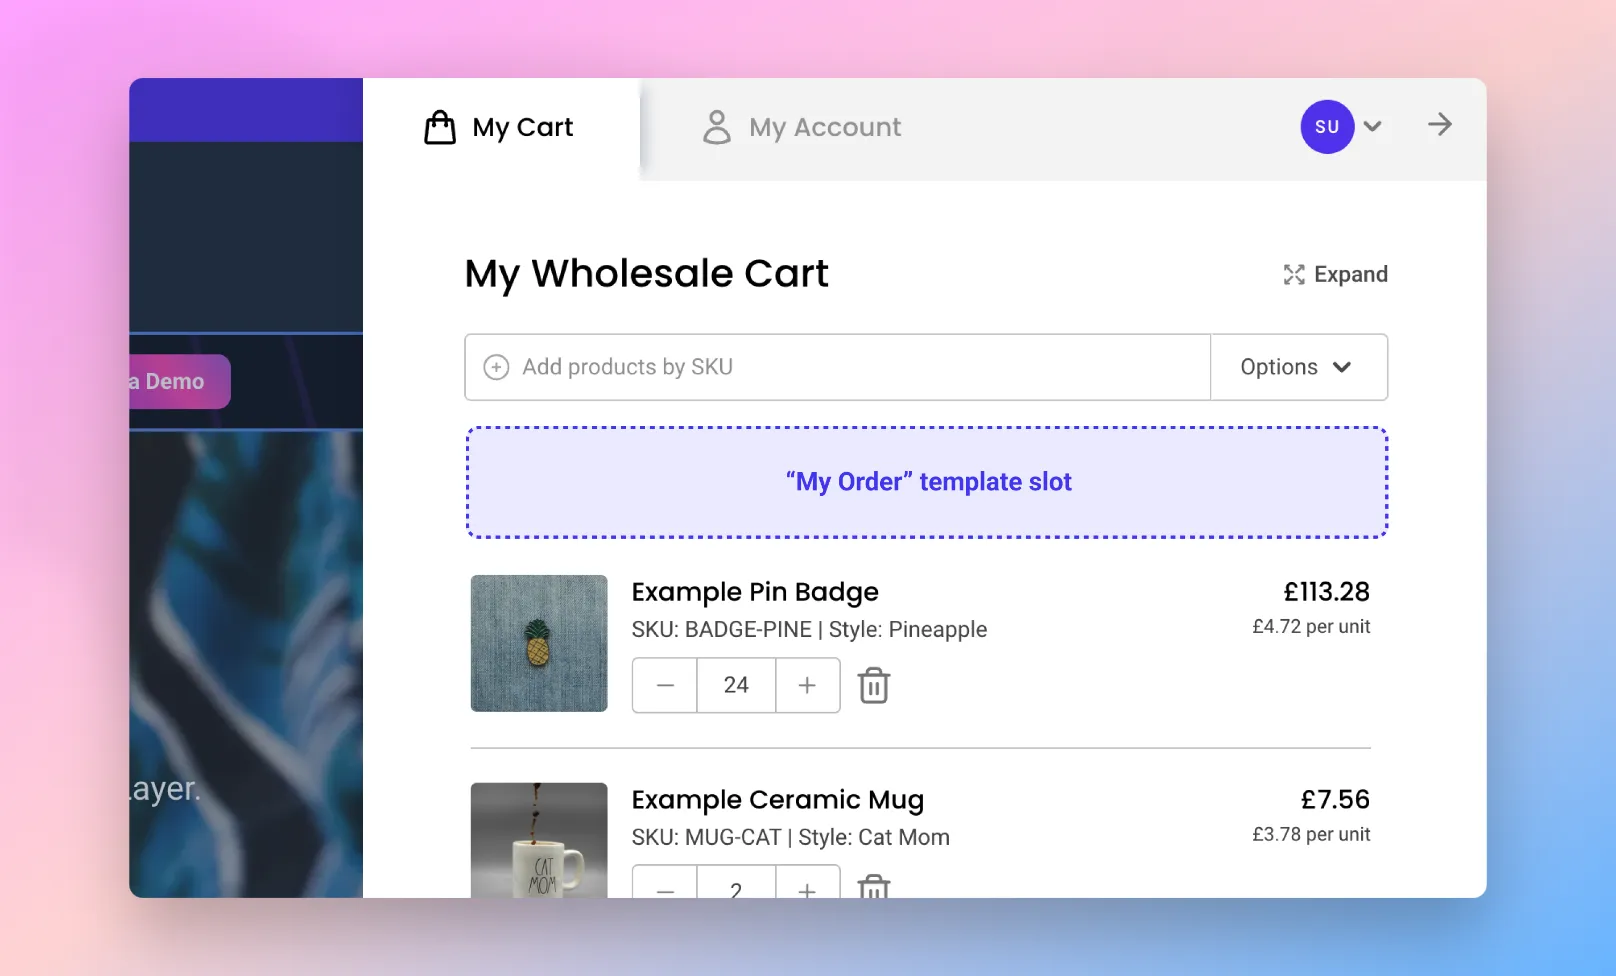
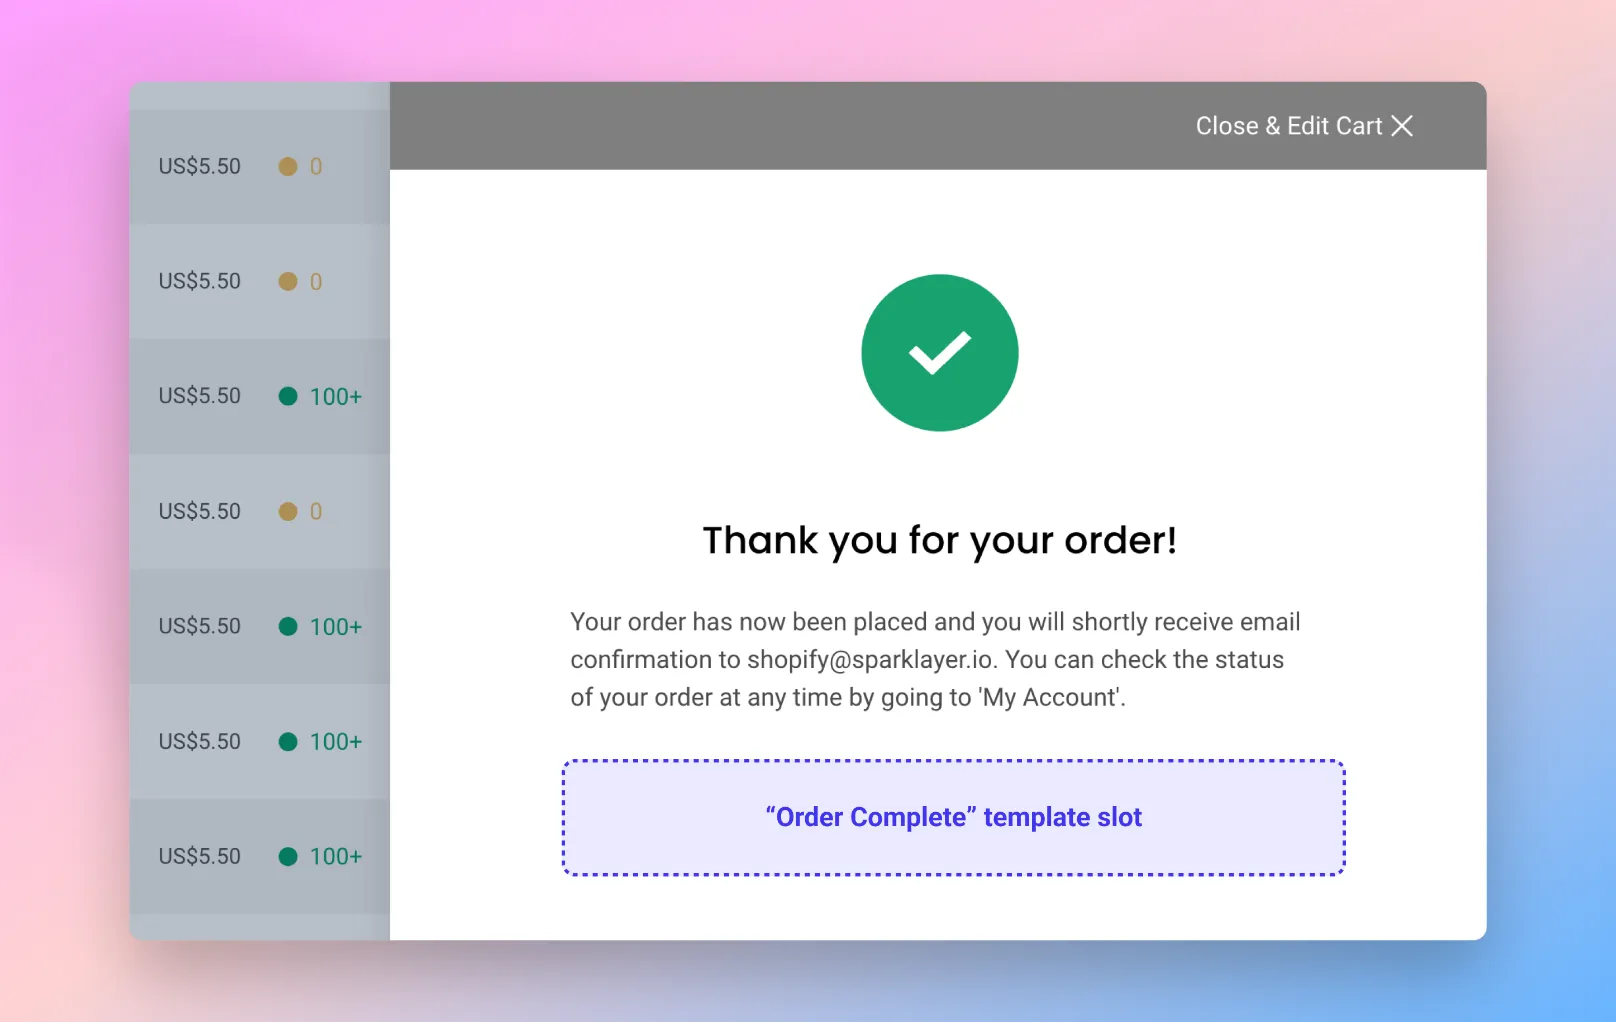
You can learn more in our custom slots guide here.
Pricing Display
If you have RRP pricing (MSRP) set up, by default the My Cart Interface will display this below the main selling price.

If you'd prefer to hide this, you can add the below CSS to your CSS overwrites.
--spark-cart-rrp-display: none;
Cart Image
It's possible to change how the product image is rendered in the My Cart Interface by using special CSS overwrites. This is especially useful if your product images aren't square in ratio and you want to prevent the image being cropped.

Simply add one of the below options to your CSS overwrites.
--spark-cart-background-size: cover /* Set image to fill the space*/
--spark-cart-background-size: contain /* Set image to be fully visible*/