Account & Addresses
Custom My Account fields
Within the My Account Interface, the customer can see a summary of their details such as email address, company name, and financial details from the "My Details" section. It's possible to set up additional "custom fields" within the My Details area, allowing you to include other information that may be relevant to your B2B customers.

Setting custom fields for the My Details area works in a very similar way to the custom checkout fields feature, by adding special code to your website within the SparkLayer Core Script. You can use our sample below to get started.
Updating the display You can update the default display by adding code to your Core Script. Learn more about how to update display settings on SparkLayer
/* Add the below code into the SparkLayer Core Script */
/* Please refer to our help guide on how to do this */
 customAccountDetails: [
  {
    title: "Website",
    value: "{{ customer.metafields.global.company_website }}",
    type: "website",
    displayText: "Visit Website",
  },
  {
    title: "Phone",
    value: "01234567890",
    type: "phone",
  },
  {
    title: "Email",
    value: "[email protected]",
    type: "email",
    displayText: "Click to email",
  },
  {
    title: "Some normal text",
    value: "This is a normal value with no formatting",
  },
],
/* End of code */
Custom element configuration options
Key | Details |
|---|---|
title | The label name to show to the customer, e.g. "Website" |
value | The value, this can either be set manually or dynamically generated, e.g. via a metafield or setting |
type | The field type, with the following options
|
displayText | By default, the value will be shown to your customers. If you'd prefer to show custom text, you can use the displayText field. For example, for a link, you could use displayText: "Click here" |
Please note If you are using our Sales Agent Ordering functionality, there is an important limitation to be aware of that applies to custom fields that are based on a customer metafield.
When a sales agent signs in as a B2B customer, they will not see the value inputted in the metafield on the customer's account - rather they will see the value inputted in the agent's account itself.
Order statuses
SparkLayer supports a range of orders statuses (e.g Processing, Shipped) and you can learn more about how this works in our guide here.
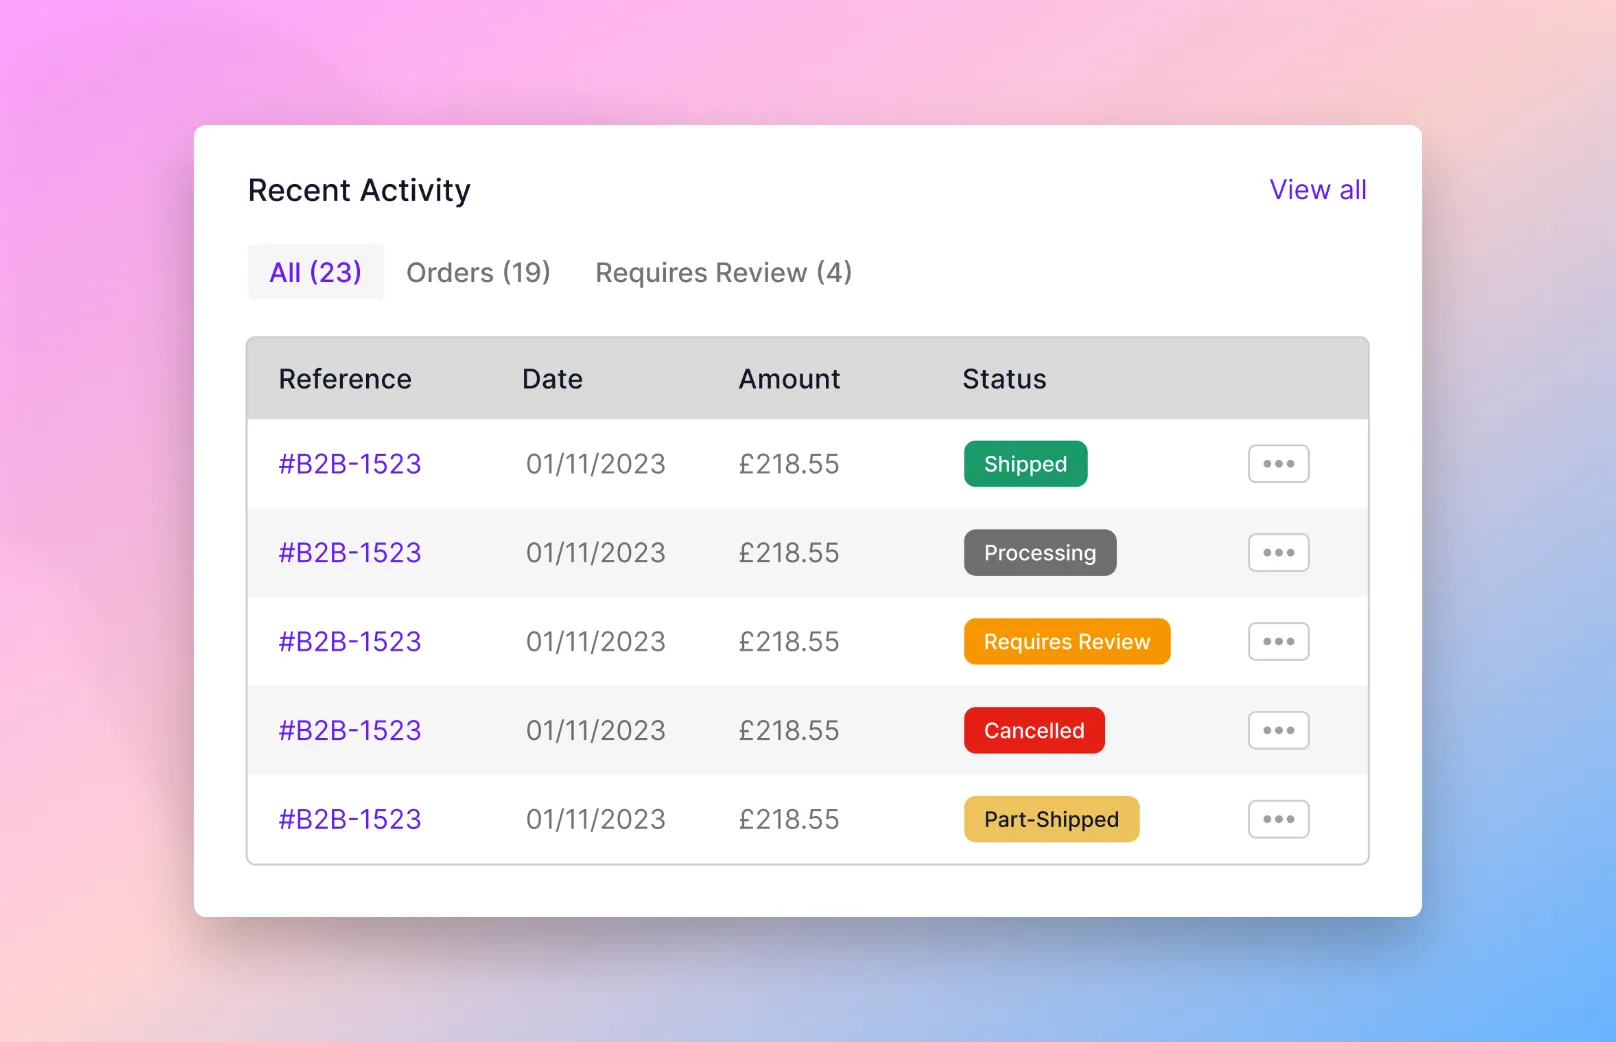
If you'd like to change the naming conventions for the order statuses shown, you can update these using special language string settings.
Updating language and text You can update the default text by adding code to your Core Script. Learn more about how to update text on SparkLayer.
/* Add the below code into the SparkLayer Core Script */
/* Please refer to our help guide on how to do this */
translations: {
  en: {
    "account.order-status.incoming": "Incoming",
    "account.order-status.returned": "Returned",
    "account.order-status.cancelled": "Cancelled",
    "account.order-status.shipped": "Shipped",
    "account.order-status.part_shipped": "Part-shipped",
    "account.order-status.part_returned": "Part-returned",
    "account.order-status.varied": "Varied",
    "account.order-status.processing": "Processing",
    "account.order-status.awaiting_approval": "Requires approval",
    "account.order-status.awaiting_merchant": "Awaiting merchant",
    "account.order-status.archived": "Archived",
  }
},
/* End of code */
Payment status
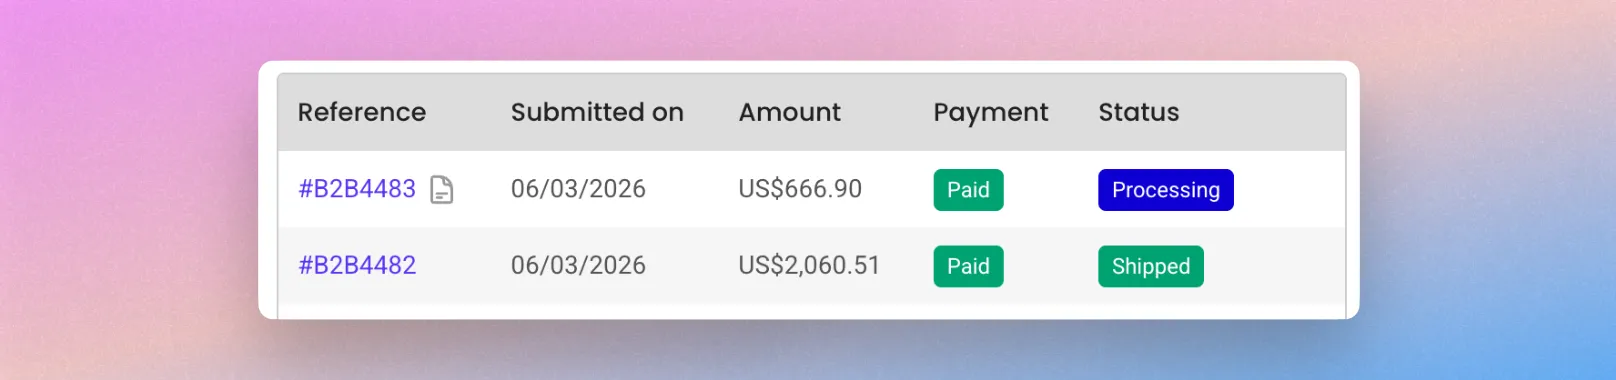
Alongside shipping status, you can give your customers a real-time view of their Payment status (e.g. Paid, Unpaid). Learn more in Payments Visibility.
Show shipping address summary
If you want to give customers an easy way to show their shipping address for an order, you can optionally display this from their My Account overview.
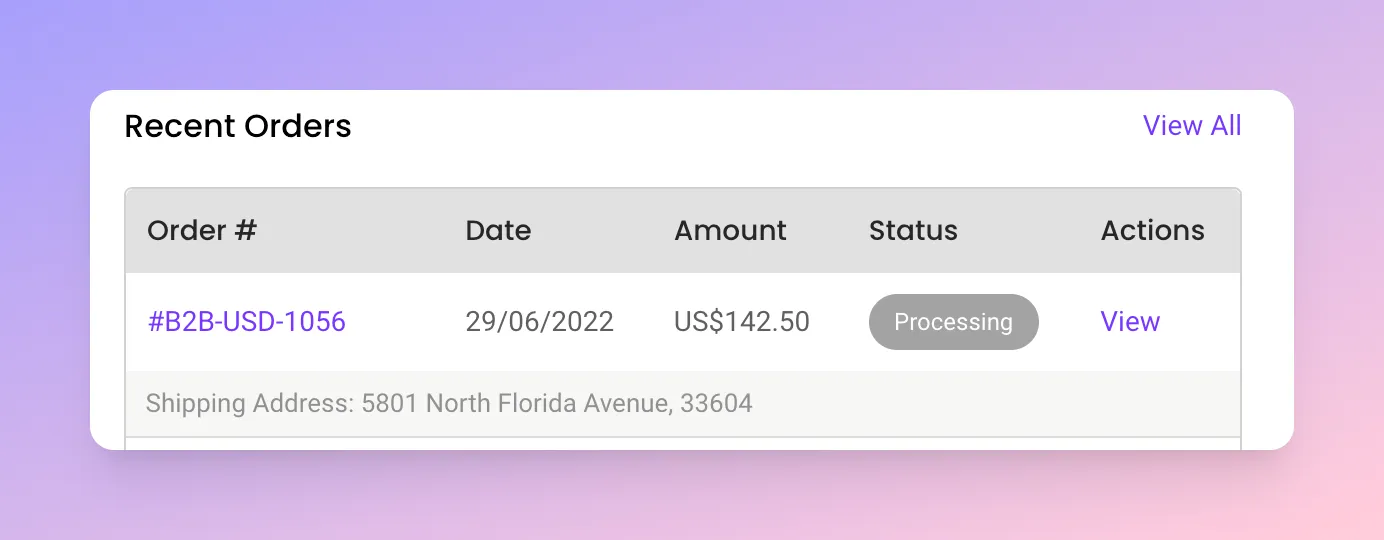
Updating the display You can update the default display by adding code to your Core Script. Learn more about how to update display settings on SparkLayer
/* Add the below code into the display object within the SparkLayer Core Script */
/* Please refer to our help guide on how to do this */
orderListShowShippingAddress: true,
/* End of code */
Allow address editing
SparkLayer supports full address editing and adding, allowing customers to manage their online address book. With the My Account interface, customers can simply click the icons next to each address to edit or delete an entry or add a new one. Learn how to configure this in our guide here.

Please note Address management is enabled by default. If you'd prefer customers to not be able to edit or add addresses, you can turn that off via the SparkLayer Dashboard. There is also an option to prevent addition and modification of the default billing address. This still allows for addition and modification of other addresses.
Order tracking (shipping) details
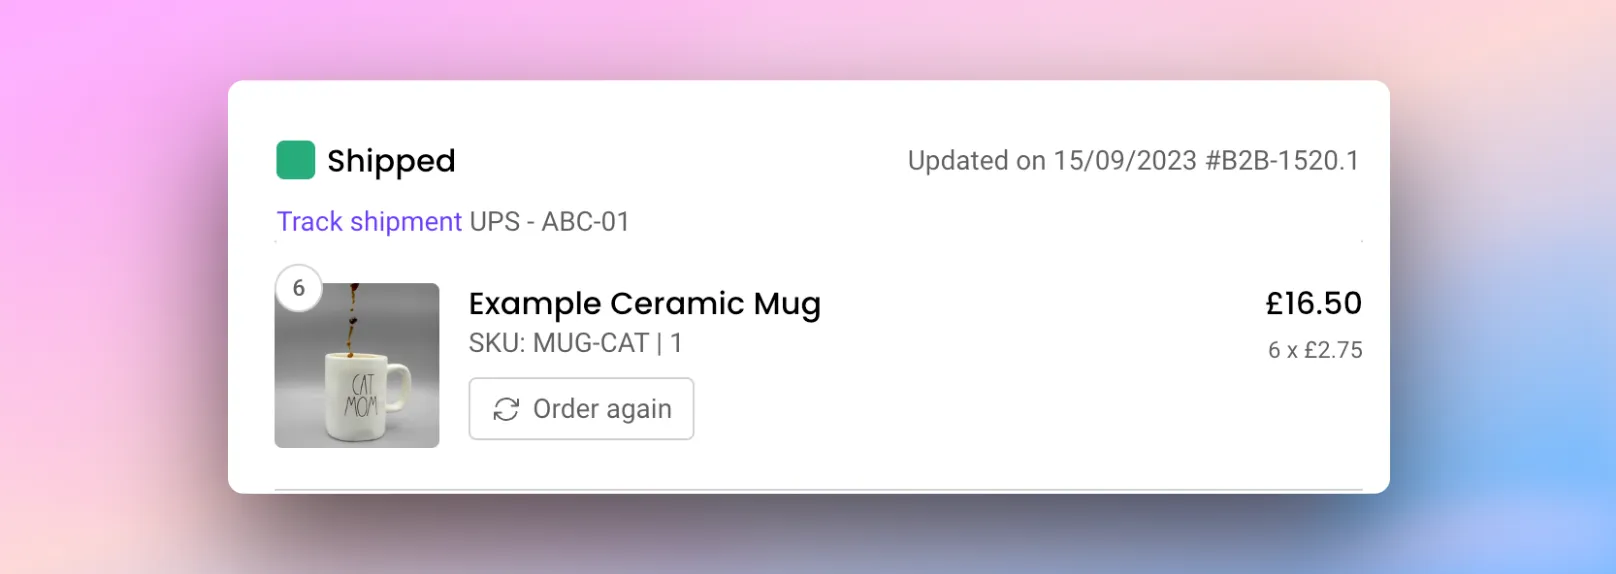
SparkLayer has support to show order tracking information against an order, allowing customers to view shipping tracking details. This also works for part-shipments for an order, giving the customer great visibility of their order details.
Within Shopify, go to an order and go through the fulfilment process. Under "Tracking information (optional)" enter the tracking number and shipping carrier (this can be automated via a third-party app)
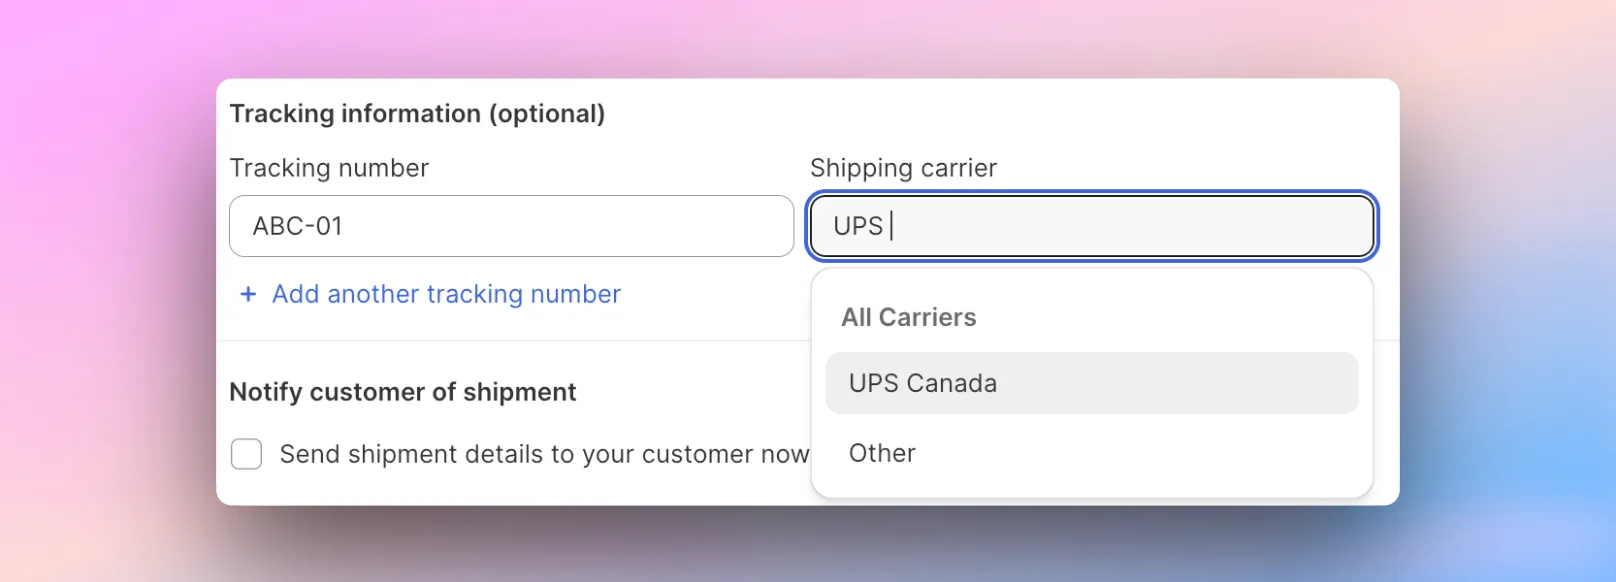
Once added, this will then show in the My Account Interface for the customer when viewing an order detail page.
Account credit and credit balances
Please refer to Credit, Net Terms, & Invoicing
Timeline & Communications
The Timeline & Communications feature provides a streamlined way to track communication and activity across all order types within SparkLayer, including Quotesquotes (if enabled).
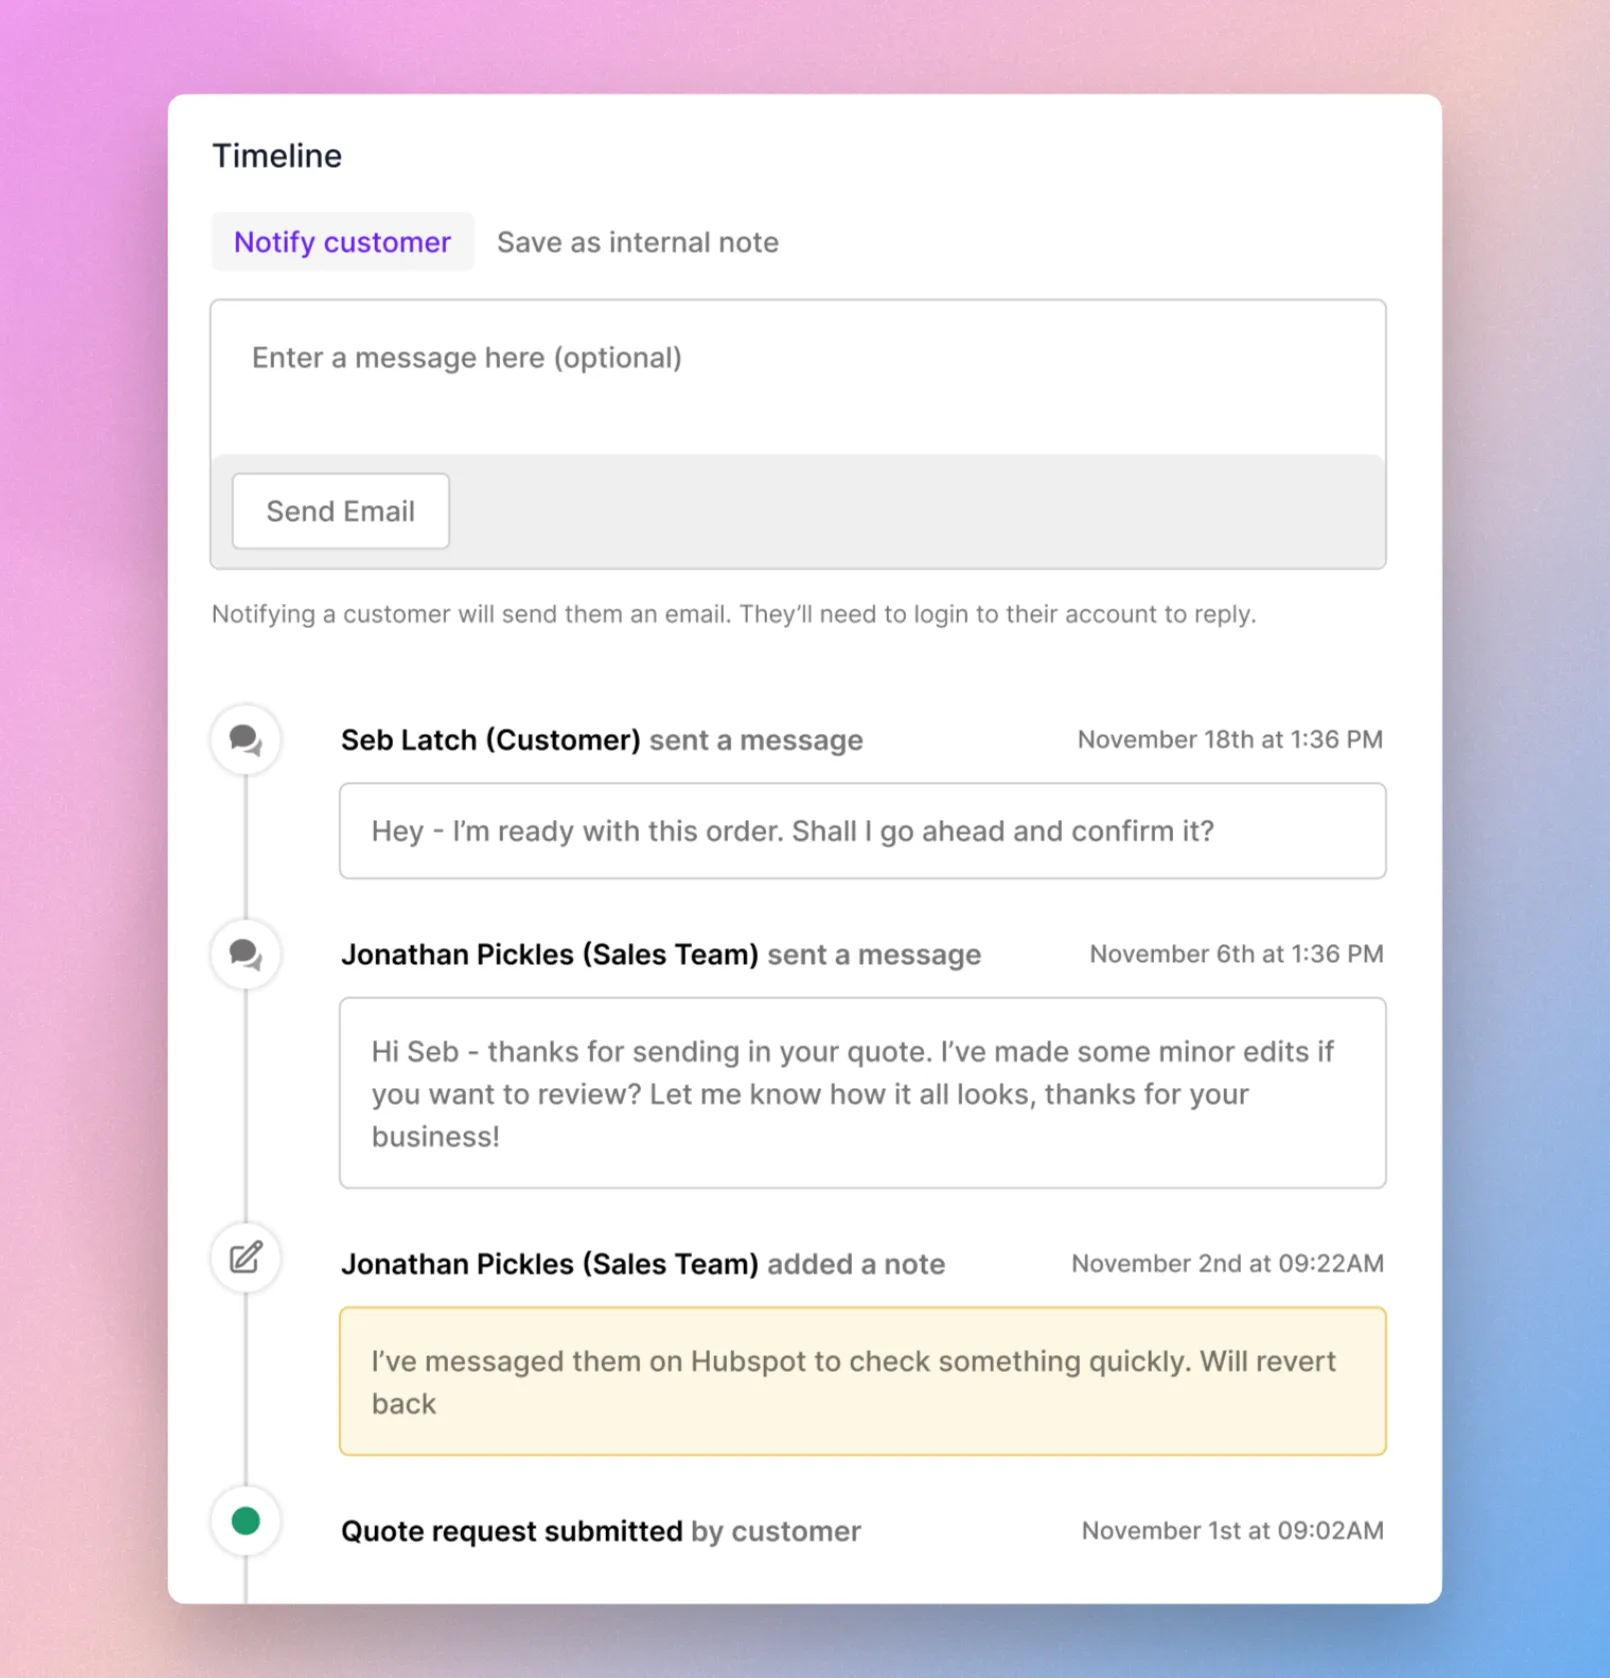
It displays messages, internal notes, and order events, and related email notifications in one centralised area. Learn more in Timeline & Communications .
Account redirect
When a logged in customer accesses your website's existing my account area (e.g. /account), it will redirect them to the SparkLayer My Account interface instead. If you'd prefer, you can change the default handling and set a custom URL to redirect B2B customers to once they log in. You can do this by updating the SparkLayer Core Script on your website.
/* Add the below code into the SparkLayer Core Script */
/* Please refer to our help guide on how to do this */
accountRedirect: {
  urlRegex: /\/account/g,
  goTo: "/index", // page to redirect logged in users to
},
/* End of code */Using Shopify Customer Accounts (New Accounts)
If you're using Shopify Customer Accounts, you can configure which URL to send a customer to directly via your Shopify admin. In your Shopify admin, go to Settings, Checkout, and within Configurations, click "Customize".
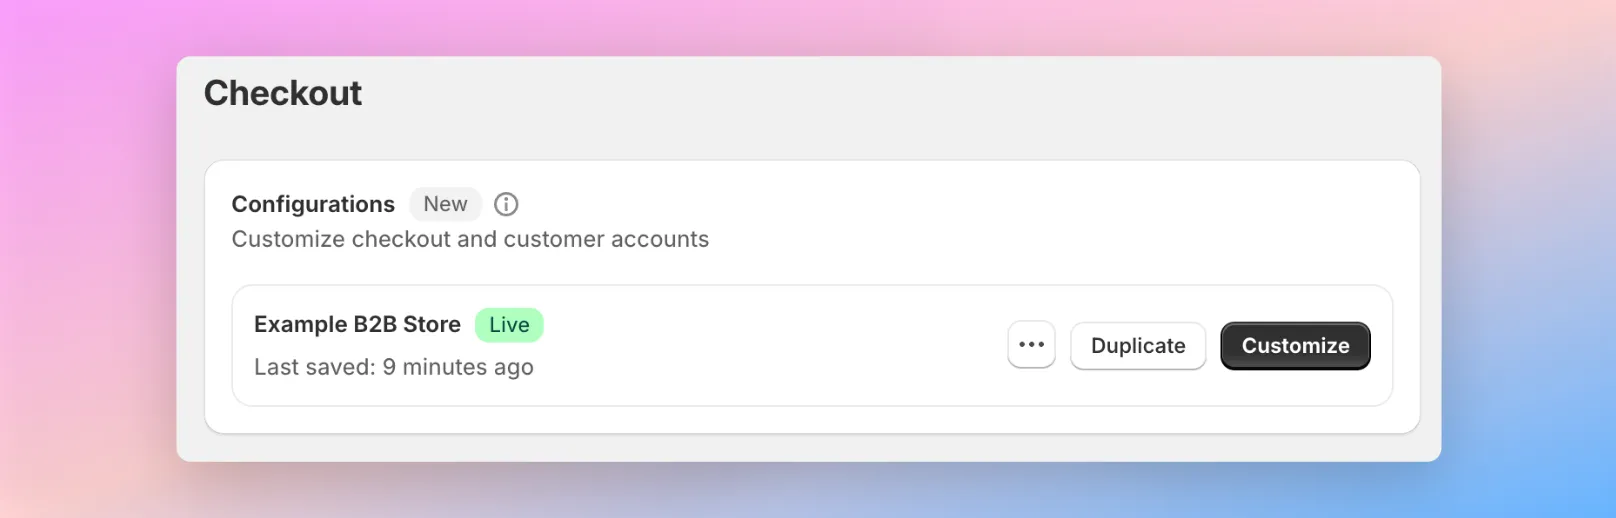
From the top, navigate to the "Orders" page, click "Apps" on the left, and then enable the "B2B Account Redirect" extension.
You can include:
- Some optional placeholder text that shows before the customer is redirected should you wish to inform them that they are being redirected.
- A specific destination URL to take the customer to once they are redirected. For example, you may want to take them to a specific collection page or a landing page.
Setting up redirect URLs based on a customer tag
If you're using Legacy Shopify accounts (Classic Accounts), you can also add handling to vary the destination redirect URL based on a customer group. E.g. customer group ABC goes to /collections/wholesale-page whereas customer group XYZ goes to /collections/wholesale-vip
Within your SparkLayer Core Script, you can replace the above code sample with the following Liquid code logic (and adapt accordingly):
accountRedirect: {
urlRegex: /\/account/g,

{% assign goTo = "/index" %}

{% for tag in customer.tags %}
 {% if tag == "b2b-group-1" %}
   {% assign goTo = "/collections/wholesale-page" %}
 {% elsif tag == "b2b-group-2" %}
   {% assign goTo = "/collections/another-wholesale-page" %}
 {% endif %}
{% endfor %}

goTo: {{ goTo | json}},

},
Quick links to view orders
SparkLayer has built-in functionality that can optionally 'auto-redirect' a customer directly to their order or quote details, simply by clicking a link. To learn how this works, please see our guide here.
Order invoices
It's possible to attach invoices (e.g. a PDF) to a B2B customer's order. Please refer to our guide here to learn more.
Showing a custom Order ID ("Visible ID")
It's possible to overwrite the standard order ID that is shown when a customer views their orders, allowing you to have consistent order IDs across systems
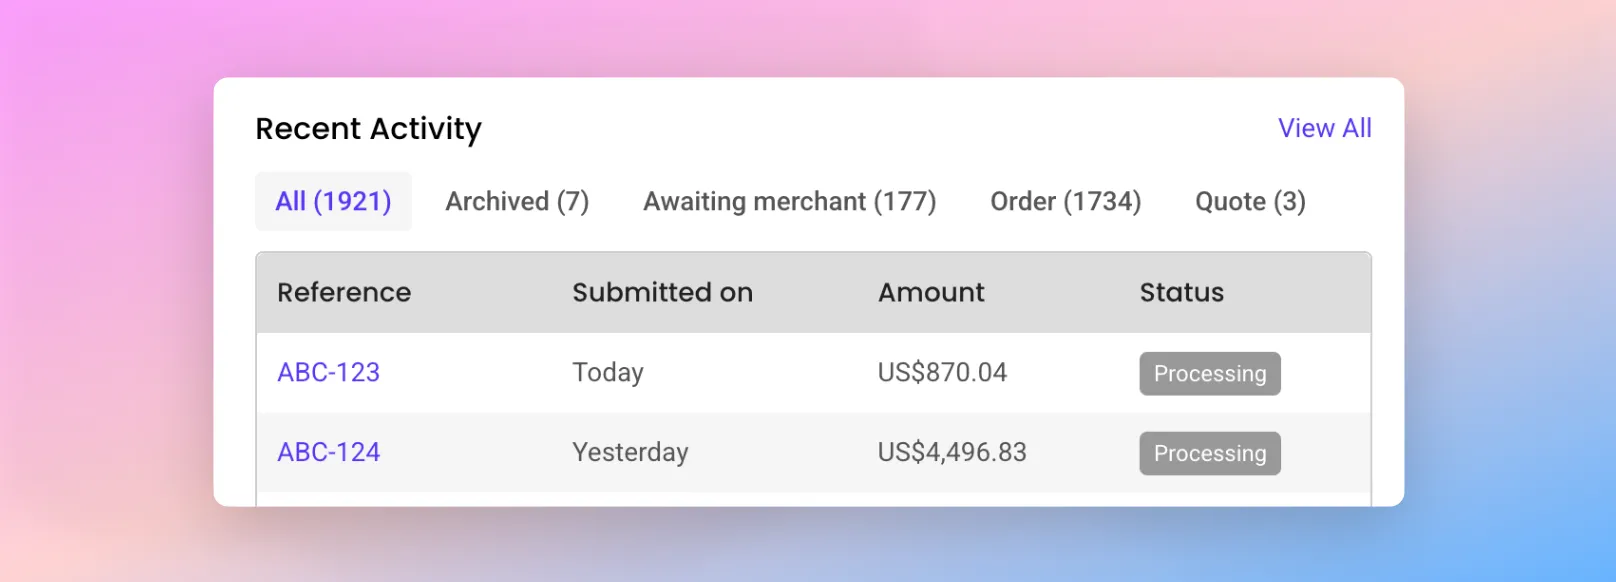
To learn how this works, see our full guide here.
Showing custom content (using "slots")
Custom Slots (or "Targets") allow you to enhance the SparkLayer My Account interface by adding your own custom code in predefined areas.
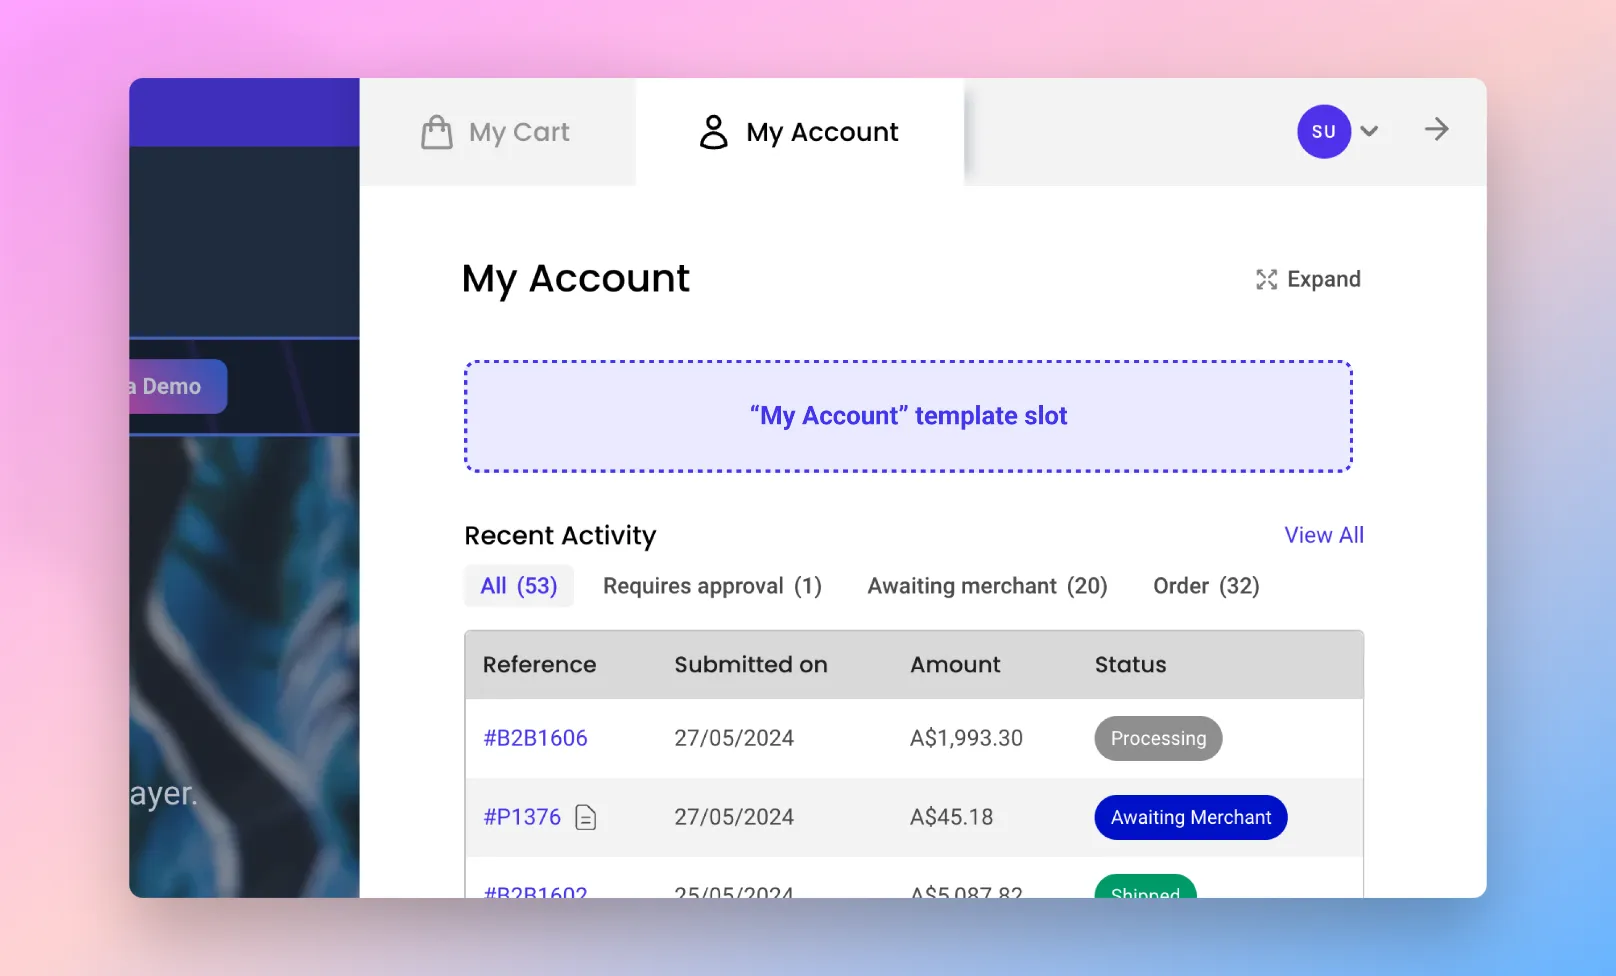
You can learn more in our custom slots guide here.
Advanced account settings
It's possible to extend how you manage the account information for your B2B customers by using special metafields. For example, if you're using a backend system (e.g. an ERP) that requires very specific address and customer data, these advanced address settings offer more granular flexibility in how data is stored. You can explore our available metafields below.
Setting up metafields on Shopify To learn more about how to configure metafields on Shopify for SparkLayer, please refer to our guide here